
Buying an e-bike is an exciting step after researching which brand you’d like to buy and what type will suit your needs. But some people forget that e-bikes require general maintenance, just like any other bike or motorized vehicle.
This step-by-step guide will help to answer any questions you have about maintaining an e-bike from simple cleaning tips to when you should be replacing key components of the bike. Find out the preventative measures you can take, as well as common issues and how to fix them.
Step 1. Your Pre-Ride Check
Before you ride your e-bike, it’s good practice to run through a few quick checks of the bike. This helps prevent breaking down unnecessarily and makes riding more carefree.
The ‘M’ Check
One popular method is the ‘M’ check. This runs through all the major components of the bike, from front to back, that you should check before going for a ride. If you draw a line through each of these points on the bike, you will notice it forms an ‘M’ shape.
| The ‘M’ Check | |
| 1. Front Wheel and Tire | Check the tire pressure and for any signs of damage or punctures in the tire. Make sure there is enough tread. Spin the wheel to check stability and smoothness. Check for any loose spokes. |
| 2. Brakes, handlebars, and display | Check that the brake pads have not worn away and work when engaged. The handlebars should be tight (you shouldn’t be able to twist it when the front wheel is held still). Turn the e-bike on to check the display is working and also that it is not loose. |
| 3. Battery and cranks | Check the battery is locked and loaded. You shouldn’t be able to remove it without the key and it should be fully charged or have enough power for your trip. Make sure the cranks and secure and working properly. |
| 4. Saddle and Seat Post | Check the height of your seat is correct for you Make sure the seat is tight and won’t move. |
| 5. Rear Wheel, Chain, and Gears | Check the rear wheel as you did with the front wheel. Make sure the bike chain is clean and lubricated. Check the rear cassette/freewheel and derailleur for signs of damage. |
The ‘ABBC’ Check
Another popular method is the ‘ABBC’ check. This method is also quicker so it’s good for those early mornings before work when you’re running short on time. It covers the bare minimum of what you should check before riding your e-bike.
| The ‘ABBC’ Check | |
| A | Air in both tires |
| B | Battery has enough charge |
| B | Brakes are working in the front and back |
| C | Chain is lubricated |
As you can see, the ‘ABBC’ check is much simpler than the ‘M’ method. However, the ‘M’ check will give you peace of mind that you’ve checked all that you can before setting out on your ride.
Step 2. Provide Safe Transportation
If you need to transport your e-bike before your ride, like to a riding trail or while traveling, there are a few more things you need to consider that are not usually an issue with a normal bike.
Transport with a Car
Transporting any bike with a car usually involves two options; a roof rack or a rear, hitch-mounted bike rack. The main issue with an e-bike is the heavy weight of the bike. It’s not recommended that you transport your e-bike with a roof rack because the weight will make it less stable than a regular bike and risk damaging both the bike and the roof rack. You may also struggle to haul so much weight above your head.
The preferred option is using the rear-mounted bike rack. You’ll only need to lift the e-bike about 18-20 inches (half a meter) or so off the ground and it’ll be far more stable. Just check that your e-bike does not exceed the weight limit of your particular bike rack.
If there are some components of the bike that you don’t want to get wet, you might want to consider using a waterproof cover. This is mainly a good idea for the electric console. Most components of an e-bike should be water-resistant and therefore tolerate a bit of rain.
Transport on a Plane
If traveling on a plane for a holiday or when moving, you won’t be able to bring the e-bike’s lithium-ion battery onboard a passenger plane. This is the same whether it is in the cabin or in the cargo hold and is because of fears that these batteries may explode.
Technology has helped resolve this issue; however, you still can’t fly with e-bike batteries. Therefore, if you’re taking your e-bike, you’ll need to remove the battery prior to check-in.
With this in mind, you might consider sending your battery on a cargo plane to your destination. This can be expensive but might be the best option if you are moving interstate or overseas.
If you’re going on a holiday, it might work out cheaper and easier to hire a battery instead. You’ll just need to make sure your battery is stored correctly, which I’ll talk about later on.
Safety Considerations
It’s a good idea, no matter what method of transport you’re using, to remove any valuable and removable components of the e-bike so that they don’t get stolen. They can be stored safely with you or in your car until you reach your destination. This mainly includes the battery and the electronic console.
Step 3. Clean Your E-Bike
Cleaning your e-bike should be done after every ride. This is particularly important if you have been riding in areas that might cause your bike to corrode, such as in the sand or even near the beach.
Find out more about maintaining your e-bike after riding in the sand:
Riding Your E-Bike in the Sand: Tires and Maintenance
Water is good enough to clean your e-bike in most circumstances. Some people use water from their garden hose to wash the e-bike down. Although this seems quick and easy, you’ll have to be very careful not to use any high water pressure on the bike. High pressured water can make its way into the electronics.
Instead, you can just use a damp rag to wipe it down. You might also want to use a gentle brush or sponge to help remove any stubborn dirt or grime. Some cyclists will opt to use bike shampoo or some form of gentle soap or detergent on their bike as well.
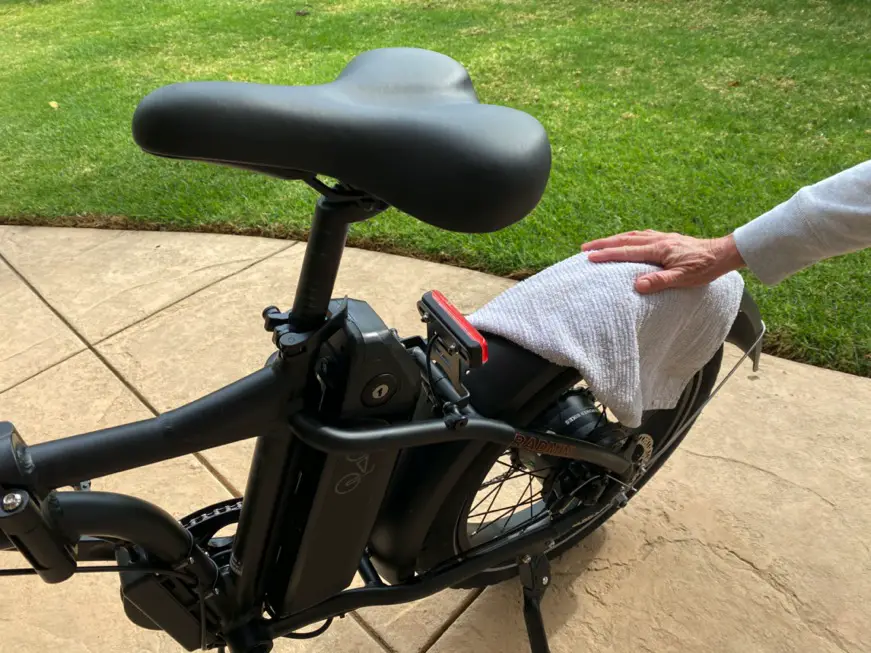
When cleaning the e-bike down, it is important to cover the electronic console with a cloth to prevent any unnecessary water damage. It’s even better if you can remove this and the battery from the bike before giving it a clean.
You may also need to use a dedicated degreaser for the drivetrain. Because there is oil lubrication on the chain, this area can pick up dirt and debris and become quite dirty if not cared for properly. A degreaser should get rid of all the grime. Just remember to lubricate the components again when you’re done and then wipe off any excess lubrication.
Step 4. Store Your E-Bike Safely
- Store your e-bike undercover or indoors.
- Always clean your e-bike before storage.
- Be mindful of your e-bike’s weight.
- Store your e-bike in a cool, dry place – ideally 32-68oF.
- Make sure to store the battery indoors with a 30-60% charge.
Your e-bike should be stored undercover in a cool, dry place. This could be a garage or shed, depending on how hot those areas get. But, typically, your shed will be exposed to large temperature fluctuations, so this isn’t recommended. If it’s possible, as generally happens with a folding e-bike, you should store your e-bike indoors.
You should make sure your bike is clean and dry when storing, whether long-term or just for the night. This will prevent dirt build-up and will make it easier to clean every time. As I mentioned earlier, if you’ve been in conditions that could be corrosive to the bike, it is very important to clean the bike down straight away to prevent irreversible damage.
It’s up to you exactly how you store your e-bike undercover. Some people will simply ride the bike into the shed and lower the kickstand. Others will mount the bike on the wall or hang it from a ceiling mount. If hanging the bike, you just need to consider the weight, as electric bikes are usually much heavier than regular bikes. Make sure the brackets are reinforced in the wall or ceiling to accommodate this weight. Additionally, you’ll need to be careful when you lift your e-bike every time.
Ideally, the temperature in storage should range between 32-68oF. This is primarily because of the battery. Freezing or higher temperatures can lessen its life span. However, because the battery needs to be recharged, most people will usually remove the battery and store it within their home to charge anyway. If you can remove the digital display, it’s a good idea to store this with the battery as well to prolong its life.
If you’re storing the battery long-term, such as throughout winter, you need to take extra precautions. Try to keep the battery indoors in an area that is dry and, again, within 32-68oF. You should also store it with 30-60% residual charge. If it is fully charged or discharged, this puts stress on the battery and reduces its lifespan.
Learn more about storing your e-bike… Read this:
How to Safely Store an E-Bike: Outside vs Inside
Step 5. Conduct At-Home Maintenance
There are several main components of your e-bike that you can check and take care of on your own at home. We’ll take a look at them here.
Drivetrain
The drivetrain is all the components that are involved in moving the bike. These components include:
- Pedals
- Cranks
- Chain rings
- Chain
- Cassette
- Derailleur
These components are made of metal, so they require lubrication to continue functioning correctly. If there is no lubrication, the metal grinding against other metals will cause friction, making it harder to use, and will also cause it to wear away a lot quicker.
The main movement occurs in the chain, which is why bike chains are usually the first thing to go. For e-bikes, specifically those with mid-drive motors, the chain has even more stress because of faster average speeds and more weight in the bike. For this reason, you should lubricate your chain once a month if using your e-bike regularly.
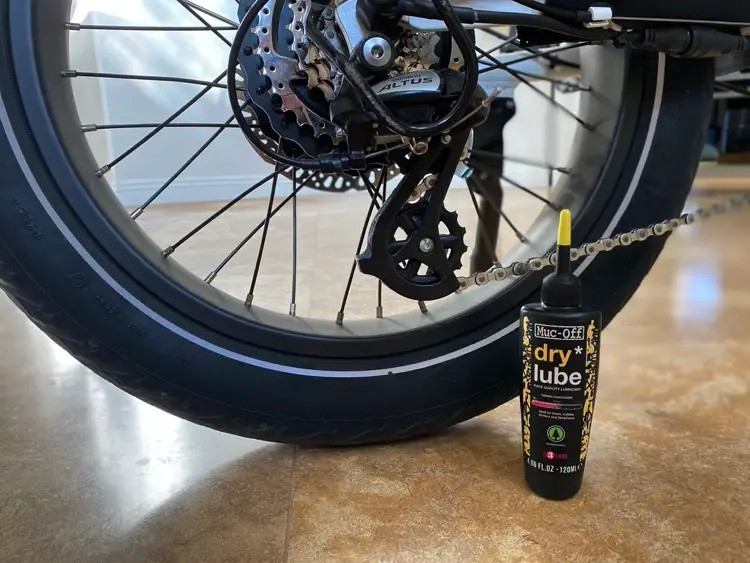
Because the drivetrain components are all connected, lubricating the chain should also help lubricate the rest of the components. When you do this, you don’t want a build-up of grease around the cassette or brake discs, so it’s best to target the center of the chain, away from the other components. Then the chain will carry the lubrication to the other components as it cycles through.
You should also be using a degreaser prior to lubricating the drivetrain to remove any old excess grease and oil.
As part of your at-home maintenance, you should keep your eye on the wearing of your chain. This should be done roughly every 250-500 miles for an e-bike. Generally, it will need to be replaced after around 2,000 miles.
Checking your chain can be done using a cheap tool called a chain wear indicator. This tool checks any elongation of the chain and any thinning in the rollers.
The cassette should be replaced at the same time as the chain. So this will also need to be replaced roughly every 2,000 miles. Keep in mind that some e-bikes will wear the chain and cassette faster, such as electric mountain bikes. If you are taking your e-bike off-road, you’ll generally find you need to replace these components twice as often.
Frame and Wheels
The frame is easy to fix, provided you have the right tools. Here are some tools you might find convenient:
- Torque wrench
- Spoke wrench
- Allen keys
- Tire pump with pressure gauge (I use this one)
- Pedal spanner
- Lubricating oil
The most common thing you will be doing is checking the tire pressure. Tires will lose pressure over time, even if you haven’t run over any thorns or glass. It’s therefore important to know what pressure the tires should be on your particular e-bike. This is measured in PSI, which means pounds per square inch.
Here is a general overview of what PSI you can expect in different types of e-bikes. But keep in mind that you should always refer to the manufacturer’s recommendation for your specific tires.
| Road E-Bike | 80-120 PSI |
| Standard E-Bike | 40-80 PSI |
| Mountain E-Bike | 25-45 PSI |
If you have a tire pump with a pressure gauge, this process will be made very easy. It’s a good idea to keep one of these with you while you ride so that you can pump up any flat tire tubes along the way.
Another part of the tire that you’ll need to be mindful of is the tread. Make sure the tires haven’t worn too thinly because this will increase the chance of the tire going completely flat.
The spokes of the wheel should be checked to determine if any have become loose. This is where the spoke wrench will come in handy. This tool simply tightens the spokes at the rim.
In terms of the rest of the bike, there are many bolts that you can check over. If there are any loose, you will need to tighten them. However, these bolts should not be over-tightened as this can cause damage to the bolt and thread. This is why it’s a good idea to have a torque wrench to monitor how tight they are.
Brakes
Depending on which brakes you have on your e-bike, there will be different maintenance requirements. Brakes are something that you want to ensure are serviced correctly, so if you’re unsure about what you’re doing, it’s best to leave it to the professionals.
An e-bike will commonly have either mechanical or hydraulic disc brakes. In both instances, you need to make sure the brake discs do not get any oil on them. If they need to be cleaned, you can use a cloth and isopropyl alcohol.
Besides cleaning the disc brakes, you can also replace the cable in the mechanical braking system when needed, or change the oil in a hydraulic system. This is generally recommended if the oil has changed color.
Hydraulic brakes are changed roughly every 6 months, whereas replacing mechanical cables should be done every 6-12 months. Mostly, people will rely on service technicians to replace these things or will have a look themselves if they find the brake levers are not as responsive.
Here is a general timeline of maintenance that you can do at home on your e-bike between services.
| General Maintenance Guide | |
| Before Each Ride (minimum ‘ABBC’ check) | Check air in tires; Check battery is charged; Check brakes are working; Check chain is lubricated |
| Every Week | Check bolts and tighten as required |
| Every Month | Lubricate the chain and other drivetrain components; Check chain for signs of wear (usually after 250-500 miles) |
| Every 6 Months | Consider replacing your cassette and chain (usually after 2,000 miles); Book an official service if you haven’t had one in the past 6 months (regular use;) Consider draining hydraulic brakes or replacing brake cables |
| Every 12 Months | Book an official service if you haven’t had one in the past 12 months |
Step 6. Servicing an E-Bike
Of course, if you aren’t mechanically minded and everything in the above section scares you, you don’t need to worry. That’s what service technicians are for. Service your e-bike at least once a year, or every 3-6 months if you use your e-bike on a regular basis.
E-bikes are like cars. Some people enjoy the technical aspect of maintaining a vehicle by making small adjustments here and there, but others are quite happy to only drive their car to the service center when instructed to do so.
If you take your e-bike in to be serviced, the technicians looking over your bike are going to check everything I mentioned earlier, and more. They know exactly what to check and when to check it.
In particular, they can look over the electronics and motor. These are things that can be more complex to deal with, and therefore it’s not recommended that anyone but a qualified bike mechanic touch them. Trying to fix or service these components yourself may void your warranty.
When you do get your e-bike serviced, it’s better to take it straight to the manufacturer. The service technicians there will know exactly how to work on their own brand of motors and batteries. On average, an e-bike motor will last around 10,000 miles, so keeping it going as long as possible should give you a decent run. They can also run updates and diagnostics on the software.
Even though servicing your e-bike will cover all aspects of essential maintenance, it’s still a good idea to know some of the key points of maintenance that I’ve mentioned in case you do break down and you can’t get in last-minute to have it fixed.
This is because, even if you service every 6 months, riding just 11 miles each day is going to add up to over 2,000 miles in that 6 months. That means someone commuting to and from work would need to live less than 5.5 miles from their workplace and service their e-bike every 6 months to potentially avoid replacing the chain and cassette themselves.
Step 7. Understand Common E-Bike Problems
Here are some common issues that people have with their e-bikes. Having these in the back of your mind and knowing how to solve the issue will save you from a world of frustration.
Over-tightening the Bolts
I mentioned earlier that over-tightening the bolts on your e-bike can cause damage to the thread and bolt. It can also make it hard to undo them again when more maintenance is required. This is particularly an issue if you use a more powerful tightening tool at home, only to be stuck on the road with a multi-tool that can’t undo the bolts.
This is easily prevented by becoming familiar with the recommended torque to use on your e-bike’s bolts. You can then use a torque-wrench to tighten the bolt with that recommended torque. Make sure you can loosen the bolts with your multi-tool before you finish so you know you’ll be able to work on the bike when on the road as well.
A Flat Battery and Leaving the Battery In
Forgetting to charge the battery is a simple, yet very common, mistake. It is easily fixed by charging your battery after every ride. Try to get into a routine when putting your bike away.
Another common and potentially dangerous issue with the battery is leaving it in when you work on the bike. Particularly if you are working on the drivetrain, you don’t want any components to receive any power while your fingers are caught up in the chain or gears. Simply remove the battery every time you do any kind of maintenance on your e-bike.
Hanging Your Bike Upside Down
Some people might choose to store their e-bike upside down like they would with a regular bike. However, this is something that will damage the electronic console over time. Small amounts of water that is trapped within the bike can also drain into and collect within the head tube, causing it to seize up over time.
Incorrect Tire Pressure
Having the wrong tire pressure will make you work harder to pedal unnecessarily, and also cause the e-bike motor to work harder. This then drains the battery faster than normal.
This is mainly an issue for mountain bikes because some people will use them both on-road and off-road. You can find a table above that gives a rough estimate of the PSI required for each situation, but in general, rougher terrain does not require as much air in the tire.
Misaligned Sensors and Loose Cables
Whether the sensors have become dirty or misaligned, or the cable has become loose, sensors that aren’t working correctly will mean that the power assistance will also fail. To prevent this, make sure to keep all aspects of your bike clean after each use and check the cables if you suspect the power assistance is not working properly.
On a similar note, if you’ve been unplugging electronic equipment, such as removing the motor, make sure you return all the cables as you found them. What seems like a major fault in the e-bike could be a cable that was not reconnected properly. This is generally why it is recommended to leave electrical maintenance to qualified service technicians.
Stray Lubricating Oil
Getting lubricating oil on other parts of your e-bike leads to unnecessary dirt build-up, as well as serious complications. One common mistake is lubricating the chain close to the brake discs. If there is lubrication on the brake discs, they will no longer have the friction required to work and you could be in serious trouble if traveling at high speeds.
This is completely preventable by oiling your chain in the mid-section where it is free from all other components of the bike. If you do happen to get oil on the brake discs, carefully wipe this off using isopropyl alcohol until there is definitely no oil left. Then it’s a good idea to test the brakes at low speeds after that to make sure.
Parting Words
You might be mechanically-minded and can’t wait to get into your e-bike parts, or you might just want to take your bike to the service center when required. Either way, I hope this article has helped in your understanding of e-bike maintenance and how you can keep your e-bike in the best condition.
