You’re planning on riding an e-bike for the first time and it’s a little scary. Getting injured or breaking an electrical component are both concerns. But if you follow simple instructions, those fears can be squashed in a matter of minutes.
Beginners can easily learn how to use an electric bike by following simple step-by-step instructions. They can complete each of these five steps and the included checklists and be safely riding an e-bike in no time.
| 5 STEPS: HOW TO USE AN ELECTRIC BIKE | CHECKLIST |
| Step 1. Do a Safety Pre-Ride Check | Pre-Ride Checklist |
| Step 2. Check That You Have the Appropriate Gear | Gear/Accessories Checklist |
| Step 3. Get Fitted to Your E-Bike and Helmet | Correct Fit Checklist |
| Step 4. Begin Your Ride | Start Riding Checklist |
| Step 5. What to Do After Your Ride | Post-Ride Checklist |
Having been a beginner rider not too long ago, I remember all of the questions I had about how to use an electric bike. Now, in this article, I’ll answer a lot of the questions that I had when I was starting out.
I’ll also share a few of the mistakes that my husband, Marc, and I made when we were new to e-bike riding.
Step 1. Do a Safety Pre-Ride Check
As a beginner e-bike rider, you most likely have a new bike or are renting one from a reputable bike company… so both should be in good working condition.
But for safety’s sake and to reduce later inconvenience when something doesn’t work right during your ride, the first step to using an electric bike makes a lot of sense.
Doing a pre-ride check-up on your e-bike will give you the assurance that it’s safe and will work as you expect it to. You don’t want to get stuck far from home with a flat tire tube, loose chain, or battery that’s lost its charge. After all, e-bikes are heavy to push and may not even fit in the car that comes to rescue you.
Pre-Ride Checklist
| Tires Inflated Properly | |
| Battery Charged | |
| Brakes Work (Double-check if riding down hills!) | |
| Chain in Good Condition | |
| Headlight Shines Bright |
Tires Inflated Properly
Check the air pressure with a tire pump or gauge. Make sure it’s set to the manufacturer’s specifications (check your e-bike’s manual or find it online). Tire pressure can be very different depending on the type and size of the tires, so it’s better not to guess on this.
Additionally, riding on tires that are under-pressurized can wear them out sooner or cause damage to the rims.
You might also want different pressure depending on what type of terrain you’ll be riding on. But, as a beginner, just know the standard pressure.
Battery Charged
Because you’re a beginner when it comes to riding an electric bike (and this might be your first time), you probably don’t realize how long you can actually be out riding. Not only will you have a ton of fun so time will pass quickly, but you can go fast, therefore ending up far away from home before you know it.
So make sure your battery is fully charged!
Additionally, check that your battery is securely locked onto the bike. Give it a gentle tug to make sure it isn’t loose.
Brakes Work
Squeeze both hand brakes to make sure they’re working. You should feel them tighten. You can even move the bike forward slightly as you apply each hand brake so you can feel them stop the bike.
If they squeal loudly and don’t clearly stop the forward motion of your bike, then get this fixed by a professional before you ride.
Chain in Good Condition
Check to see that your bike chain has not come off and that it rolls smoothly with the bike. If it makes a lot of noise or is “crackly”, then give it a bit of lubrication.
Headlight Shines Bright
Make sure your headlight turns on before you head out. You wouldn’t want to end up riding home later than you thought you would and end up in the dark, not at all visible to cars. However, a headlight is an important safety feature that can be used during the day as well to give you an extra level of visibility.
Step 2. Check That You Have the Appropriate Gear
Not only will the right accessories keep you comfortable on your ride, but they may also protect you from unforeseen mishaps and things you may have forgotten.
And comfortable gear will make your ride more enjoyable. Plus, for example, as a beginning rider, you may not realize how much colder it can be riding a fast e-bike, even if it seems warm outside in general.
Gear Checklist
| Helmet | |
| Water | |
| Ear Coverage | |
| Eye Glasses | |
| Layered clothing | |
| Sturdy Shoes | |
| Tire Repair Kit | |
| Rear-View Mirror | |
| Sunscreen |
Helmet
No bike rider should set out without a helmet. Period. But the fact that even an average rider tends to go fast on an electric bike (because it’s easy to do!) makes it even more important.
Further, as a beginner, you need some time to understand how quickly you can get moving on an e-bike, as well as how to slow down when you need to. Because it’s motorized, it starts a little quicker and but doesn’t stop as quickly.
FULL DISCLOSURE: On my first ride, I almost didn’t stop before hitting my daughter’s car. And when my husband was a beginning rider, he throttled too hard going up a dirt hill and did an accidental wheely, almost flipping the bike entirely. Thankfully, no one was hurt and we learned how to handle our e-bikes quickly.
The point is, you are too important not to protect your head! Take a look at the Recommended Gear list to get more info and suggestions on getting the right helmet.
Water
Many newbies set out without water thinking that it’ll be a short ride. However, when you’re out there having so much fun, it quickly turns into a long ride. Further, riding fast can really dry out your mouth and throat.
So take water with you. If you don’t have a water holder on your e-bike yet, then you can always take a small backpack or attach a water bottle to your bike rack.
Ear Coverage
Like I’ve said before, even if it’s fairly warm outside, riding fast wil make it feel much colder. If you have snestive ears, then you’ll definitely want to protect them.
Wear a headband that covers your ears, a hoodie (if it fits under your helmet), or a scarf or ski mask that covers your ears (these will keep your neck and face warm if it’s cold too).
Eye Glasses
The wind from riding can also dry out your eyes or whip small particles into your eye. You can help prevent this by wearing eyeglasses or sunglasses.
Layered Clothing
Even if it’s warm and you wouldn’t wear a jacket while walking, you might end up feeling pretty cold while riding. So, take at least a lightweight, stretchy jacket on your trip that’s easy to tie around your waste or fit inside your backpack or on your bike rack.
Wear comfortable top layers to peel off later in case it gets warm.
Sturdy Shoes
Wear sturdy shoes that help your feet grip the ground if you need to stop quickly. Solid shoes can also protect your feet from the bike and the ground in case you take a tumble.
Tire Repair Kit
As a beginner, especially if you have a new bike with new tires, you probably won’t need to repair any tires while out on your first few rides. However, there are no guarantees.
So it’s a good idea to have (and know how to use) a tire repair kit. You can get a small tire repair kit on Amazon for under $30.
Rear-View Mirror
I put a left-side rear-view mirror on my e-bike within a week of getting it. And there’s really no reason to wait. On my first ride, I immediately got nervous not being able to see what was coming up on my side. And, once I had it, I felt so much more comfortable riding.
The goal is to see what cars and other fast-moving bicyclists are coming up on your left (this applies to how we drive in the USA). This gives you an opportunity to move further right or slow down a bit to let them pass.
Sunscreen
Okay, this may be obvious, but you’ll be outside in the harmful rays of the sun much longer on your e-bike than if you were on a regular bike.
Take a look at the Recommended Gear I’ve compiled!
Step 3. Get Fitted to Your E-Bike and Helmet
Make certain your e-bike is well-fitted to your body before riding and that your helmet fits snugly. Because e-bikes are quite heavy, they can be harder to stop and manipulate than a regular bike.
Take a look at this list to be sure that everything fits correctly so that you have the best chance of staying in control of your e-bike.
Correct Fit Checklist
| Fit Your Helmet Snugly (Protecting your head comes first!) | |
| Raise or Lower Your Seat | |
| Tilt Your Seat If Possible | |
| Adjust Handlebars | |
| Adjust Rear-View Mirror |
Fit Your Helmet Snugly
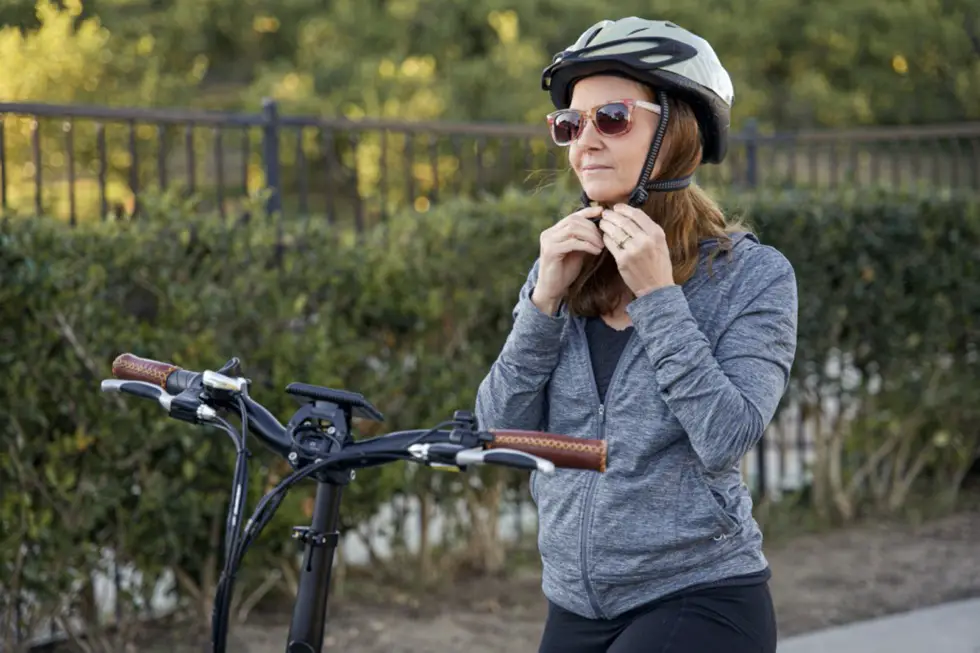
Your e-bike helmet should fit snugly but also be comfortable. Look into a mirror to see that it’s laying flat on your head with the front edge well over your forehead. The tip of the helmet should be just above your eyebrows so that the front of your head is protected but it’s not blocking your vision.
Raise or Lower Your Seat
Move your seatpost up or down (keeping it pointed to the center of the bike) until you think it might be in a good spot. Then test it out by straddling the seat. When in this position, only the balls of your feet need to reach the ground.
Your feet do not need to be flat but if you fit on your e-bike this way and can still pedal comfortably, then it might work for you.
Tilt Your Seat If Possible
If your e-bike has this feature, play around with the tilt until you’re comfortable but still feel like you’re seated squarely and won’t slide off.
Adjust Handlebars
If your e-bike has adjustable handlebars, play with them until you find a comfortable arm position. This might differ depending on the type of e-bike you have and how you’re riding it.
Most beginning riders on an upright bike will find that having their hands reach the handlebars just below their shoulders will work nicely.
Adjust Rear-View Mirror
Your e-bike might not come with this, but as it was included in your “Gear Checklist” above, I obviously think it’s very important. So, if you have one, seat yourself and go ahead and adjust it away from your body.
This works just like a car rear-view mirror. If you can see a good part of your body, tilt it to the left more (assuming you have a left-side mirror) until you can see more of the street and less of your arm.
Step 4. Begin Your Ride
If you’ve completed the previous 3 steps, then you’re ready to start riding. This is where the fun begins!
You may have to complete some of this as a “mental” checklist once you take off riding, but you’ll most likely remember it since it’s just a couple of steps at the end.
Start Riding Checklist
| Turn on Your E-Bike Battery Correctly (Be careful not to unlock it!) | |
| Set Your Display | |
| Get on a Level Surface to Start | |
| Begin Riding Far Away From Cars and Other People | |
| Start Pedaling on Level 1 Pedal Assist |
Turn on Your E-Bike Battery Correctly
First, make sure you know how to turn your battery to “on” versus unlocking it from your e-bike. Practicing this a few times will also ensure that you’ll notice when you’ve accidentally left it in the “on” position when you’re done riding (I’ve done this!).
Then take the key(s) and decide where and how you’ll keep them safe (they’re usually pretty tiny). You may wish to take your key with you in case you’d like to stop in the middle of your ride and save the battery charge while you do.
Set Your Display
Make sure your display has the most important modes easy to read. You’ll definitely want to make sure you can read which pedal assist level you’re in at any given time. Make sure you know how to easily move between pedal assist levels.
And having your trip odometer reading showing will let you know if you’re going farther than planned.
In addition, you might like to know how fast you’re going at any given time, rather than your average speed.
Get on a Level Surface to Start
Since you’re new to using an e-bike, walk it to a level location before riding it for the first time. The first few times you ride you’ll really notice a kick to it when it starts.
So it’s best to explore how this feels where it’s flat and you don’t have to deal with shifting or changing pedal assist levels right away.
Begin Riding Far Away From Cars and Other People
The same is true here. Start far away from moving and parked cars, people, and other bike riders. Get adjusted to how the bike stops and starts, rides around corners, and uses its electric motor power, before riding in congested areas.
Start Pedaling on Level 1 Pedal Assist
When you begin riding, your e-bike should be at the lowest level of pedal assistance. Don’t worry about changing this immediately. Stay at the lowest level until you’re super comfortable with the feeling of the motor, as well as starting and stopping.
Read more about how to use the pedal assist feature and throttle:
How to Ride an E-Bike without Pedaling: Pedal-assist vs throttle
Step 5. What to Do After Your Ride
Don’t worry. There’s not much to do here. The purpose of completing this step is basically to make sure your e-bike is in good shape and ready for the next ride.
Then you’ll have less to do when you’re back to Step 1 (your safety pre-ride checklist).
Post-Ride Checklist
| Clean Your E-Bike | |
| Check Tires for Damage | |
| Re-Charge Battery if Needed | |
| Stretch Your Muscles (yes, e-biking is exercise!) |
Clean Your E-Bike
Wipe down your e-bike after each ride with a dry or slightly damp rag. Keeping it clean and free from debris will keep the electrical components in good shape for longer and protect your investment.
Read this article for more information on cleaning and maintaining your e-bike:
Riding Your E-Bike in the Sand: Tires and Maintenance
Check Tires for Damage
Check to make sure your tires haven’t lost significant air pressure. This can suggest damage to the tire. You might also like to fill them up so that they’re ready to go riding again tomorrow!
Re-Charge Battery if Needed
Before you turn off your digital display, check the battery level to see how much you used. This will give you a good idea how quickly the battery can be discharged based on the type of riding you’re doing.
Then you can go ahead and re-charge it so it’s ready for next time.
Stretch Your Muscles
Yes, you heard me! Don’t think for a minute that you won’t be getting good exercise riding an electric bike. New bike riders of any kind might feel tight in the hips, glutes, or legs (consider wearing padded bike shorts to reduce some of the discomfort). And, on an e-bike, you’ll likely ride farther and longer than expected.
So, be sure to ask your doctor or fitness professional about stretching before and after each e-bike ride.
Congratulations New E-Bike Rider: You’re Now an “Experienced” Beginner.
If you’ve followed each of the five steps and completed each checklist, you’ll have an easy time using an electric bike. Although you’ll probably feel like a beginner for several more rides, every riding experience you have will make you feel more comfortable.
Even though this step-by-step guide on how to use an e-bike seems lengthy, trust me when I say that these five steps will come naturally after doing them a few times. You’ll only be a beginner for a short time!
And using an e-bike to get around will provide more excitement and fun than any regular bike possibly could. The rewards will be great. Enjoy!


