If you’re an e-bike rider like me, you know how cold hands can make a ride uncomfortable—even unbearable. And wearing regular gloves while riding doesn’t keep the tips of your fingers from feeling the bite of the cold wind.
So I was super excited to try the Savior Heat thin heated gloves to keep my hands warm yet let me grip the handlebars securely, unlike with other thicker, heated gloves.
These are the Savior Heat Thin Heated Breathable Gloves, and they’ve made riding in cold weather so much more comfortable. In this article, I’m showing you how to use them and what you need to know before you buy.
My Experience Riding With the Savior Heat Thin Breathable Gloves
I recently took a ride in 55-60 degree weather and set the Savior Heat gloves on low heat. It was just the right amount of warmth—keeping my fingers comfortable without overheating. The gloves were way hotter set on Medium and High, so I’m confident they’ll keep my hands warm in colder temperatures. Because they’re thin and flexible, I easily grasped my e-bike grips and brakes without feeling restricted.
One thing I loved is the non-slip silicone palm—it gave me a firm grip, so I never felt like my hands were slipping, whether I was braking or throttling. And I was surprised that the touch sensors on the index finger and thumb actually work! I was able to tap my phone’s screen to take a photo WITHOUT removing a glove. Being thinner than many heated gloves let me securely wrap my hands around the handlebars of my e-bike.
Unboxing and What You Get
When I unboxed the Savior Heat Thin Heated Gloves, I could tell right away—they were made for serious riders like me. Inside the box, I found the gloves, two rechargeable 7.4V batteries, a dual charger, the users guide, and a water resistant drawstring case—everything I needed to get started. The gloves were lightweight but super soft inside, and I could feel the waterproof HIPORA layer, meaning my hands will stay dry on a misty ride.
Plus, the palms had a grip on them they fit snugly around my wrist (see below for more on sizing). I plugged in the batteries, tucked them into the hidden pockets, and pressed the power button—within 3-4 seconds, I felt the warmth, and it spread quickly across my hands and fingertips from there.
Features That Stand Out
These gloves are 70% Polyester, 20% Neoprene, and lined with soft pearl cotton, making them super comfortable while still being breathable. Plus, there’s a nice waterproof layer to protect from a patch of unexpected drizzle. The battery storage pocket is snug and secure, so you don’t have to worry about the lithium-ion battery shifting around while riding.
How to Use Heated Gloves
Using these thin heated gloves is simple. Watch the video to see the gloves in action.
4 Easy Steps to Using Heated Gloves
Step 1: Charging – Fully charge them before your first use. Use the dual charger for both gloves at the same time. Step 2: Insert Battery – The battery tucks away neatly into a hidden pocket inside the glove. Step 3: Turn On – Just press the on/off button to cycle through the three heat settings. When connected to the inside pocket wire, you can see the remaining battery level on each glove. Step 4: Turn Off – Hold the button for about 3 seconds until the light turns off.
Battery & Heating Performance
The infrared carbon fiber heating elements warm up in just a few seconds, covering your entire backhand and fingertips. Savior Heat says the battery should last on low heat for six hours—plenty of time for a long ride. If it’s colder, you can bump it to medium or high, but you’ll only get around 2-4 hours of heat. But even on low, my hands stayed cozy and comfortable. I appreciated being able to see the battery level right on top of the gloves.
Sizing Advice
I went with an extra-small based on sizing recommendations and the fact that even the smallest glove is usually too big! My fingers have just the right amount of space, and my thumb lightly touches the end. Make sure to measure your hand before buying. Savior Heat shows you how to do it correctly for the best fit. If you’re between sizes, I’d recommend sizing up to make sure you have enough room for your fingers and thumb.
The Savior Heat Thin Heated Gloves are an investment in keeping your hands warm while letting you grip your handlebars comfortably. You can even use your phone without taking them off! With three heat settings, you’re covered in most any cold weather. Grab these thin and breathable, but toasty, gloves and enjoy your ride!
Hey e-trikers! If you’re wondering whether you can find an electric trike that’s powerful enough, feels stable, and provides comfort on a long ride… well, I’m excited to share my in-depth review and test ride of the Mooncool TK Pro E-Trike—a powerful, feature-packed electric tricycle designed for comfort, stability, and performance.
With a peak 1500W motor, a 450-pound weight capacity, and a massive 48V 20AH battery, this eTrike promises an impressive 45 to 75 miles of range and a 16 MPH top speed. But is it truly better than the rest? I’m Lisa at E-Biking Today and I’ve tested the New Mooncool TK Pro Electric Tricycle. If you’ve been considering an electric trike for commuting, grocery runs, or just cruising around in style, stay tuned as I break down the performance, comfort, and overall ride experience!
Plus, I’m going to tell you about the most underrated but ultra important feature for an electric trike… and the TK Pro has it!
First Impressions
New Mooncool TK Pro E-Trike was tested!
First off, I have to give Mooncool some credit here—this trike comes 95% pre-assembled! That’s right, no spending hours trying to figure out complex instructions or struggling with tiny screws. Just a few simple steps, and you’re good to go.
The build quality feels solid right out of the box. It has a low-step frame at only 12.2 inches high, which makes it incredibly easy to get on and off—a huge plus for seniors or riders with mobility challenges.
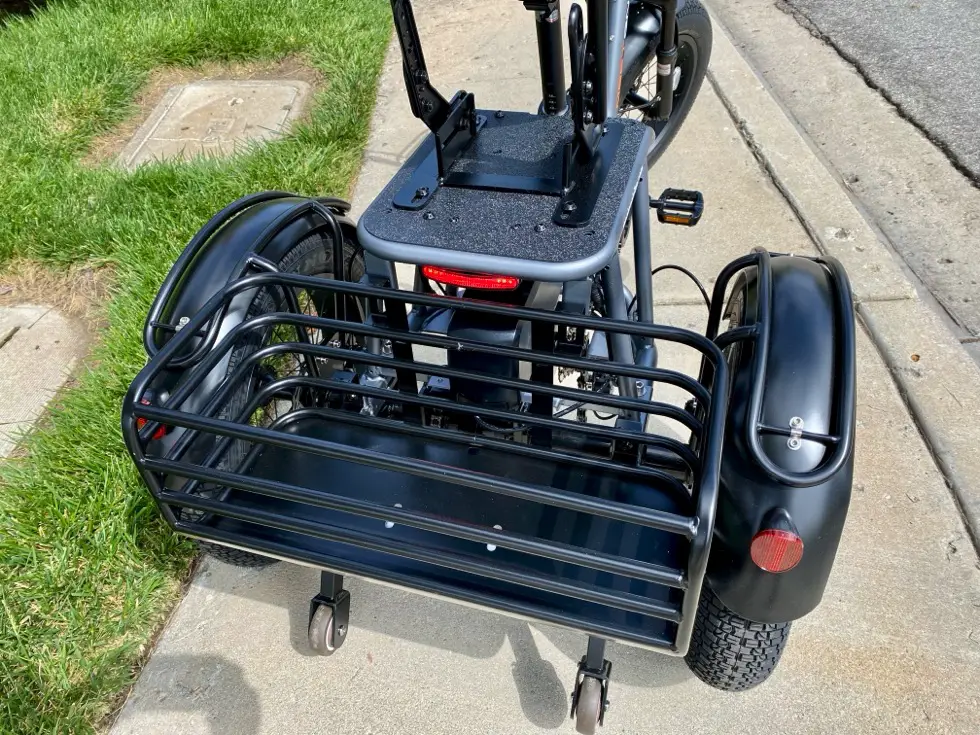
Mooncool also throws in a front basket, a rear basket, fenders, a loud horn, and even cruise control! That’s a LOT of value packed into one electric tricycle.
Power & Performance
The Mooncool TK Pro offers, power, advanced tech, and comfort!
Let’s talk about power. The TK Pro e-trike features a 750W rear-drive motor with a peak power of 1500W, which means it has more than enough torque to handle hills and heavier loads without feeling sluggish. I slowly increased pedal assist going up this long, steep hill to see how it handled. I had no problem getting up to 15mph on levels 4 and 5 before I had to slow down going over the ridge. That’s pretty exceptional for an e-trike.
Now, if you’ve ever ridden an e-bike or e-trike before, you know that torque sensors can make or break your experience. The TK Pro has an upgraded torque sensor that provides smoother acceleration and a more natural riding feel compared to cadence sensors. No jerky starts (or feeling like you’re going to fly off)—just seamless power delivery!
And the range? With a massive 48V 20AH battery, you’re looking at anywhere between 45 and 75 miles depending on factors like terrain, weight load, and pedal assist usage.
To put that into perspective, my display said the battery was still 100% charged after my first 8.3 mile ride with a few steep hills.
So, if you’re just cruising around town, expect to hit the upper range.
If you’re carrying cargo or tackling hills, or using throttle exclusively, you’ll likely get closer to 45 miles—but that’s still more than enough for daily rides!
At 16 MPH, it’s not the fastest e-trike out there, but it’s certainly quick enough for safe and comfortable riding.
Comfort & Ride Experience
Mooncool E-trike Comfort saddle with backrest!
Now, let’s talk about comfort. The vacuum-foamed saddle with a backrest makes a HUGE difference, especially on longer rides. No more stiff, uncomfortable seats—this one’s built for relaxation. I love being able to stop and sit back, without worrying about balance or keeping it upright.
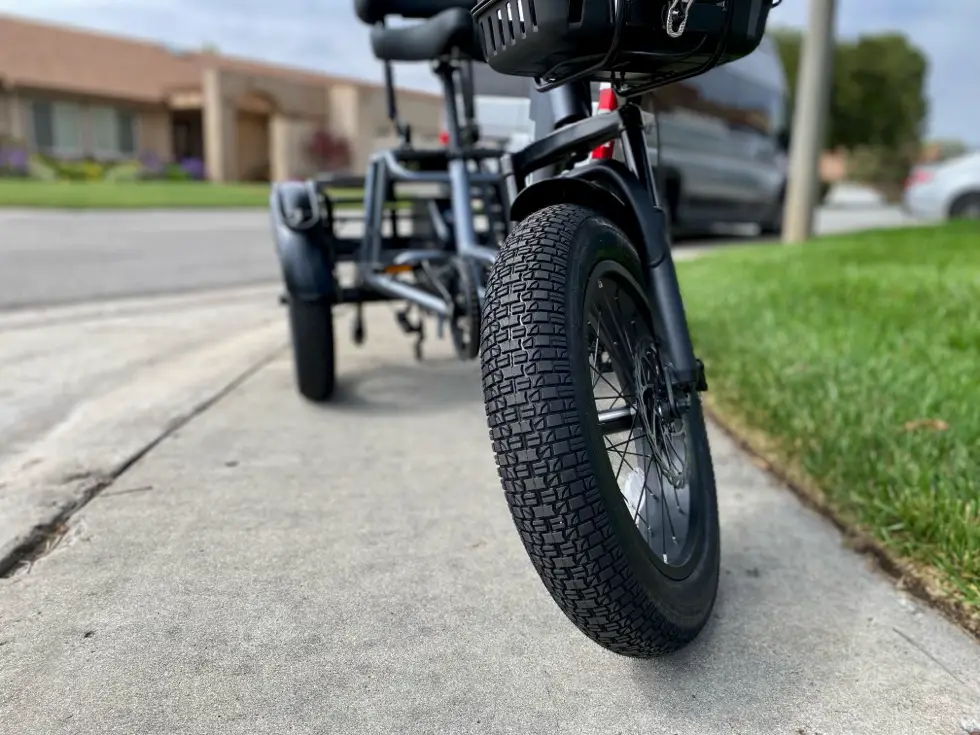
The shock absorber front fork does a great job of smoothing out bumps, while the 20” x 3” tires add a nice balance of grip and cushioning.
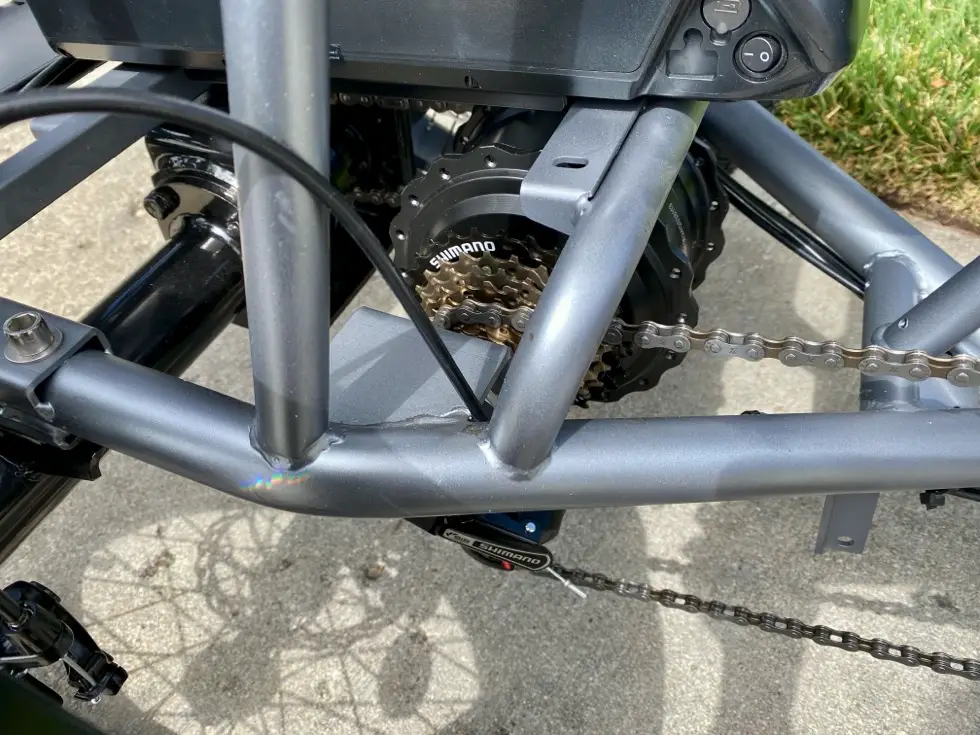
The Shimano 6-speed derailleur allows you to adjust your pedaling effort, which is a great addition if you like a bit of exercise while riding.
And let’s not forget the hydraulic disc brakes with an electrical cut-off function! Stopping power is smooth and responsive, even when riding at full speed.
The Most Important Feature on an Electric Trike
Now, here’s something Mooncool included that most budget e-trikes don’t have… a “rear differential.”
What Is a Rear Differential?
The TK Pro E-Trike is safer than those without a rear differential!
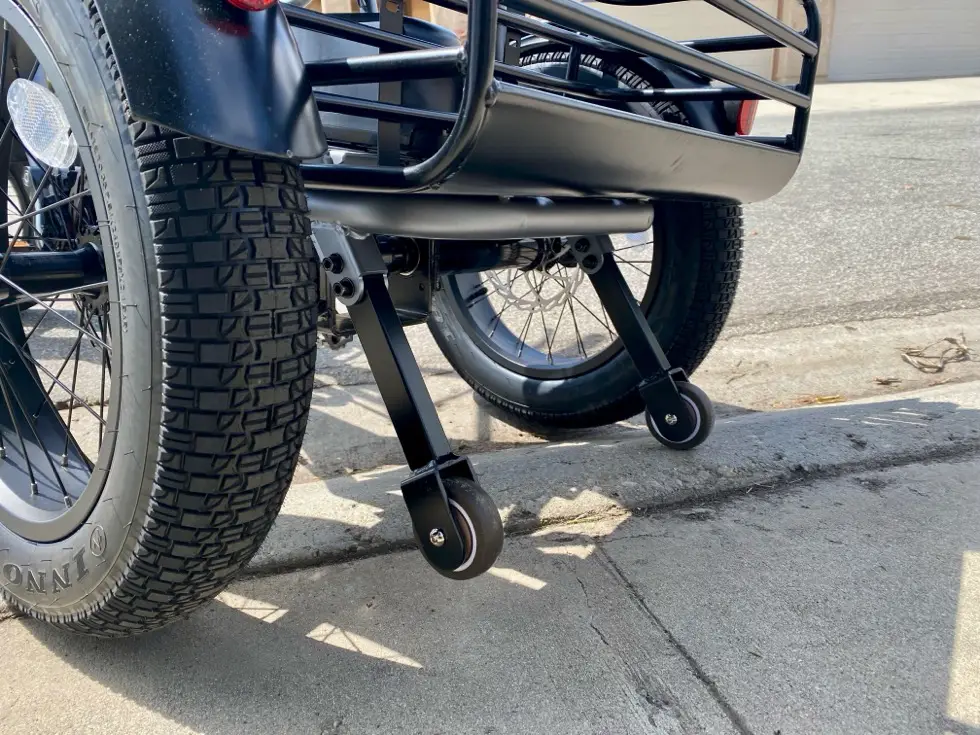
A rear differential is a mechanical component that allows the two rear wheels to rotate at different speeds when turning. This is crucial for three-wheeled vehicles, as the outside wheel in a turn naturally needs to cover more ground than the inside wheel.
On trikes without a differential, both rear wheels spin at the same speed, which can cause: ❌ Skipping or dragging – The inside wheel resists movement, making turns feel jerky. ❌ Loss of control – The trike may resist turning smoothly, leading to overcorrection. ❌ Increased tire wear – The added friction from forced wheel rotation can wear down the tires faster.
How Does a Rear Differential Improve Safety?
A rear differential greatly enhances stability and safety in several ways:
✅ Smoother, More Natural Turns – With a differential, the trike leans naturally into turns without resistance, reducing the risk of tipping or sliding. I never felt like I was tipping over.
✅ Better Control on Slippery Roads – Uneven traction (such as wet pavement, gravel, or sand) can be dangerous on an eTrike. A differential helps distribute power more evenly, reducing the risk of skidding.
✅ Safer at Higher Speeds – Since the Mooncool TK Pro can reach 16 MPH, having a differential makes higher-speed turns much more predictable and stable. I’ll point out that I still slow down significantly before curves.
✅ Less Rider Fatigue – Without a differential, you may find yourself fighting against the trike during turns. With one, you’ll enjoy a much more relaxed and enjoyable ride without needing to constantly correct your steering.
Who Benefits Most from a Rear Differential?
A rear differential is especially beneficial for: ✔️ Seniors & Mobility-Challenged Riders – Makes maneuvering much easier and reduces strain. ✔️ Commuters & Grocery Shoppers – Handling a fully loaded cargo trike is smoother and safer. ✔️ Anyone Riding on Uneven Terrain – Whether it’s city streets, dirt paths, or gravel, a differential helps keep your ride stable.
Would you want to ride an electric trike without a differential? Probably not! 😉
Features & Functionality
TK Pro Display: In color and easy to read!
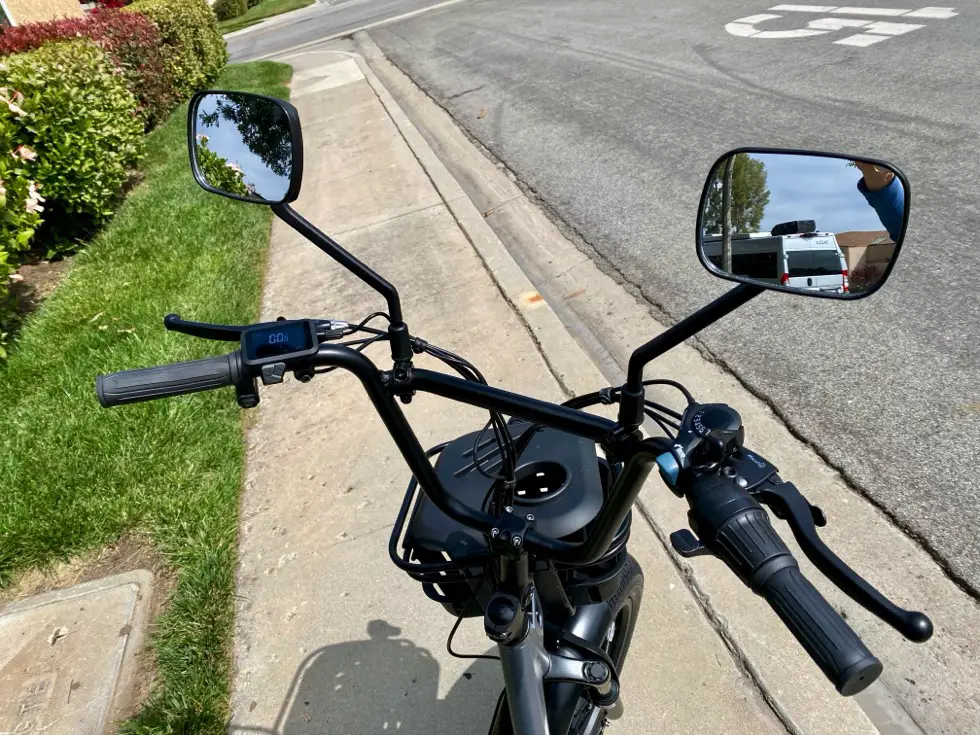
The Intelligent Digital LCD Display is easy to read even in direct sunlight—no more squinting to check your speed or battery life!
The half-twist throttle gives you full control over acceleration, and cruise control lets you relax on long rides.
And safety-wise? This Mooncool electric tricycle has you covered: ✔️ A loud horn to alert pedestrians ✔️ Hydraulic brakes with a parking brake for added security ✔️ Front and rear fenders to keep you clean in wet conditions
Plus, it comes in six different colors, so you can ride in style! I’m riding the Lake Blue. Check out all of the options! And be sure to use the E-Biking Today special discount code to save over $100 on your Mooncool TK Pro: EBIKINGTODAY (an additional 5% off on any Mooncool electric tricycle or bicycle).
Who Is This eTrike For?
Tk Pro is great for seniors and riders with physical limitations
Now, who is the Mooncool TK Pro best for?
✅ Seniors & Riders with Mobility Issues – The low-step frame and backrest make it easy to get on and off while providing excellent support. ✅ Commuters & City Riders – With plenty of cargo space and a long range, it’s a great alternative to driving. ✅ Grocery Shoppers & Delivery Riders – The large rear basket makes carrying items a breeze. ✅ RV Owners & Travelers – It’s foldable and therefore more likely to fit into your travel vehicle for your next adventure! You’ll need to keep in mind that you can’t make a trike a whole lot smaller because of the double rear tires.
Want to compare folding trikes? Take a look at my Mooncool review of the TK1 folding e-trike.
Final Thoughts – Is It Better Than the Rest?
So, is the Mooncool electric trike truly better than the rest? In many ways, yes! I had a truly comfortable and enjoyable test ride.
What’s to Love About the TK Pro E-Trike
✅ Powerful Motor & Torque Sensor – No lag, no jerky starts—just smooth riding! ✅ Massive 45-75 Mile Range – Go the distance without worrying about charging. ✅ Super Comfortable Seat & Backrest – Ride for hours without discomfort. ✅ Safety Features Galore – Hydraulic brakes, rear differential, parking brake, and more. ✅ Easy Assembly & Low-Step Frame – Ready to ride in minutes!
Is There Room for Improvement?
The 16 MPH top speed is great for casual riding and plenty fast for most riders, but if you want a faster trike, you might need to look elsewhere.
Like most electric trikes, it’s heavy. but that’s expected, especially with a 450 lb weight capacity and a large battery.
Overall, if you’re looking for a powerful, comfortable, and feature-packed electric trike that’s perfect for commuting, errands, and long rides, the Mooncool TK Pro is an excellent choice at it current price of $1999! For riders with a smaller budget, check out the original TK1 Folding Electric Trike for around $400 less. Be sure to use the E-Biking Today 6% discount code on any Mooncool purchase!
Looking for an electric fat tire bike that can tackle rugged trails, haul serious cargo, and still deliver a smooth, comfortable ride on both paved and dirt roads? Well, I’ve put the Velotric Nomad 2 through its paces, and today, I’m breaking down exactly what you can expect. I’m Lisa at E-Biking Today and in this detailed e-bike review of the Nomad 2, I’m sharing what thE NOMAD 2 can do, what makes it stand out, and what you NEED to know before buying.
Riding the Velotric Nomad 2 E-Bike
Benefits: Power, Comfort, and Real-World Performance
Right away, the Velotric Nomad 2 stands out with its 750W motor that delivers 90Nm of torque.
Power
That’s a lot of power—enough to tackle steep hills and rough trails without breaking a sweat. I tested it on both paved roads and dirt paths, and the acceleration is impressive. For example, when climbing a paved or dirt hill, I switched to Torque mode using Velotric’s SensorSwap™ Technology, which gave me that extra boost with a natural pedal feel. And when I switched to Cadence mode on flat terrain, pedaling became almost effortless—perfect for longer rides when I wanted to conserve energy.
Plus, I had so much fun using throttle and moving between pedal assist modes Eco, Trail, and Boost AND increasing the power with 5 levels in each mode … well, let’s just say, there is INCREDIBLE flexibility in how you ride.
Comfort
Now, let’s talk comfort because it’s something I noticed from the first ride. Velotric’s ComfortMax™ Design lives up to its name with an upright riding position, adjustable stem, and a suspension seat post that really smooths out bumps. Combine that with the supportive extra-wide saddle, and you’ve got a bike that’s comfortable even after a couple of hours in the saddle. I did think the saddle felt a bit slippery, so choose your riding apparel with that in mind.
Velotric Comfort saddle and suspension seatpost made my ride ultra comfy!
And I have to say that l love the color options and can’t get enough of this stunning Cranberry. But there are also several other color choices worthy of consideration. Check below the video for links to the frame and color options.
Now, here’s where it gets good: Not only does the Nomad 2 come in this stunning Cranberry color, discover more worthy color options and SAVE $60 with a special E-Biking Today discount code: EBTN201
Durability and Safety: Built to Handle the Elements
One thing I always look for is how well an ebike holds up in different conditions, and the Nomad 2 doesn’t disappoint.
Durable Frame
The frame is built to be 25% stiffer than the ISO standard, so it feels solid, which makes sense given the 505-pound payload capacity. And here’s a big surprise: It has a towing capacity of up to 1,000 pounds, which is mighty impressive if you’re planning to haul a trailer.
Safety Features
Safety-wise, Velotric goes the extra mile with UL certifications (UL 2849 for the bike and UL 2271 for the battery), ensuring that everything from the electrical system to the battery meets high safety standards. The battery is designed to withstand extreme temperatures: from freezing cold, as low as -40°Farenheit, to intense heat. Plus, the battery is waterproof with an IPX7 rating, meaning it can handle heavy rain or even accidental submersion. This is excellent news for commuters or adventurers who might end up in a rainstorm.
The 26×4.0″ Kenda anti-puncture tires provide excellent traction on dirt and loose gravel, as well as paved roads. And the RST 100mm hydraulic fork does a great job of absorbing shocks. For me, the combination of hydraulic brakes, fat tires, good front suspension, and suspension seat post made off-road riding more fun and worry-free. Plus, riding on the Nomad 2 was less fatiguing than other off-road e-bikes I’ve ridden.
Velotric Nomad 2 has 4-inch Fat Tires!
Technology and Convenience: Features That Matter
The Nomad 2 isn’t just about power and durability—it’s also packed with smart features that make riding easier and more enjoyable.
Let’s look at the tech. First, the 3.5″ full-color display is bright and easy to read. It shows all the essential info like speed, battery level, and assist modes, so you can keep track of everything at a glance. Plus, there are many features you can access in the display while riding. Further, the Nomad 2 connects to the Velotric app, which unlocks additional features and lets you track your rides.
One feature I really appreciate is compatibility with Apple Find My—a game-changer for anyone worried about bike theft. If your e-bike ever goes missing, you can locate it right from your iphone, if of course, you have one.
Use Apple Find My on the Velotric display or app.
Another big plus is Velotric’s extensive service network, with over 1,000 shops across the U.S. offering test rides, repairs, and expert advice. I always recommend buying from a brand with strong customer support. It makes a huge difference if you ever need help with maintenance or repairs.
Real-World Range and Riding Experience
Velotric advertises a range of up to 65 miles, but as always, the real-world range depends on factors like terrain, rider weight, and how much pedal assist you use. On my first Nomad 2 fully charged test ride on Torque sensor mode, I was left with 79% battery life after a 10.4 mile ride on mixed terrain. If you’re riding mostly on flat roads, hitting that 65-mile mark is definitely possible. But if you’re climbing hills, carrying heavy cargo, or riding in Cadence mode, expect the range to drop a bit. And if you’re riding full throttle, expect it to drop a lot, as is typical with any throttle ebike.
What You Need to Know Before Buying
Nomad 2 waiting to be assembled
Here are a few things to keep in mind:
Weight: The Nomad 2 is built tough, which means it’s heavier than some other e-bikes. Make sure you’re comfortable handling and storing a heavier bike, especially if you need to lift it onto a car rack. However, at 75 pounds, it’s a typical weight for full size electric fat bikes. Consider removing the battery before lifting.
Assembly: The bike is easy to unbox and comes mostly assembled, but you’ll need to do some setup. I was happy to see that ALL of the tools needed were provided, making it pretty easy to put together. Check the website for an assembly video.
Battery Charging: The battery needs to be plugged in to wake it up… I only had it plugged in for two hours before I checked it and it was charged to 100%.
Size and Fit: I prefer my accessible step-through version, fitting riders 4’11”-6’5” with two frame sizes. But you can also choose a high-step that fits riders from 5’2”-6’5” with two frame sizes.
The Final Verdict: Is the Velotric Nomad 2 Worth It?
So, after testing the Velotric Nomad 2 in real-world conditions, here’s my take: This electric fat bike delivers serious power, comfort, and versatility, making it a great choice for adventure riders yet worthwhile for everyday commuters and recreational riders.
The combination of Torque and Cadence sensor modes gives you flexibility to ride how you choose. While the robust frame and high payload capacity make it perfect for hauling cargo or tackling tough trails. And with its UL safety certifications, weather-resistant design, and smart tech like Apple Find My, it’s an e-bike you can count on, rain or shine.
So, whether you’re exploring rugged trails, hauling gear for a weekend trip, or just cruising around town, the Velotric Nomad 2 is built to go the distance. I can confidently say it’s a fat tire ride worth considering. Get ready to enjoy your ride!
So, you’re considering an electric folding bike. Smart move! Folding e-bikes are compact, portable, and fun, making them perfect for city commuting, adventure riding, or just saving space at home. But with so many options available, how do you choose the best one for your lifestyle?
Lisa here from E-Biking Today, and I’m breaking down my top five folding e-bikes for 2025. These e-bikes have stood out in my reviews for their power, portability, and overall value. Whether you’re looking for lightweight convenience, off-road capability, or the best bang for your buck, one of these is perfect for you.
Stay tuned, because you don’t want to miss the #1 all-NEW best folding e-bike on this list! Plus, I’ve listed the full e-bike reviews and detailed specs for each model.
What to Consider Before Buying a Folding E-Bike
The Portola folds up small and weighs only 60 lbs!
Before we get into the list, let’s quickly cover key factors to consider when choosing YOUR perfect folding e-bike.
1. How Will You Use It?
Are you a daily commuter who needs to store your e-bike under your desk?
An RV traveler looking for an easy-to-pack ride?
Or an off-road adventurer who needs big tires and a solid suspension?
Figuring out your primary use will help narrow down your choices.
2. Size and Portability Matter
Folding e-bikes aren’t one-size-fits-all. Some fold up compactly , while others are bulkier.
Consider the folded dimensions—will it fit in your car trunk, RV, or apartment storage space?
Can you lift it? Some folding e-bikes are surprisingly heavy, while others are lightweight enough to lift easily.
3. Battery Life and Range
Battery range varies from 30 to 55 miles depending on the bike.
Longer-range models are great for touring, while shorter-range models work well for quick city rides.
Always check the battery capacity (Ah) and motor power (W) to make sure it suits your needs.
4. Comfort and Ride Quality
Features like suspension forks, fat tires, and ergonomic saddles make a huge difference in ride comfort.
If you’re riding daily, invest in a bike with a comfortable frame and adjustable handlebars.
5. Price vs. Features
Folding e-bikes typically range from $900 to $1,800+.
Higher price often means better components, like hydraulic brakes and torque sensors.
Budget-friendly options still pack a punch, but may have fewer premium features.
Now that you know what to look for, let’s jump into the top five folding e-bikes of 2025 and see which one is best for you! Don’t forget to like, subscribe, and ding the bell for more helpful tips and electric bike reviews from E-Biking Today.
#5: Ride1Up Portola – Best Lightweight & Budget-Friendly Option
The Ride1Up Portola folds up, rides on trails and gravel paths, and costs less than $1000.
Looking for a powerful yet lightweight folding e-bike that won’t break the bank? The Ride1Up Portola (review) is a hidden gem in the folding e-bike world.
🔹 750W motor with speeds up to 28mph 🔹 59lbs – one of the lightest folding e-bikes! 🔹 Compact fold with a built-in strap for easy transport 🔹 Great for light off-roading and urban commuting
For under $1,000, the Portola is one of the best value e-bikes out there. If weight and portability are your top concerns, this is the one to beat!
Heybike Ranger S 1000W has a sleek design and comes in four colors.
If comfort is your #1 priority but you still desire power, the Heybike Ranger S (review) is a fantastic option.
🔹 Step-through frame for easy mounting 🔹 Front suspension with Lockout – absorbing bumps for a smoother ride 🔹 750W or 1000W motor & a 692Wh battery – plenty of power and range 🔹 Fat 4” tires for extra stability on various terrains
The Ranger S is perfect for riders who want a plush, cushy ride and extra support for long distances.
#3: Lectric XP 3.0 – The Most Popular Folding E-Bike
Lectric XP 3 folding e-bike
No surprise here—the Lectric XP 3.0 (review) is one of the best-selling folding e-bikes on the market.
🔹 750W motor with pedal assist and throttle 🔹 Integrated rear rack for carrying gear or an extra passenger 🔹 Budget-friendly (around $1,000!) 🔹 Great for gravel trails, light off-road, and city streets
The XP 3.0 is a go-to choice for first-time e-bike buyers who want power, affordability, and versatility in one package.
#2: Engwe Engine Pro 2.0 – Best for Off-Road Adventures
Engwe Engine Pro 2.0 Full Suspension Ebike!
For those who love off-road riding, the Engwe Engine Pro 2.0 (review) is a beast.
🔹 750 W motor with 1,200W peak power, it offers better hill climbing & acceleration! 🔹 And with both front and rear suspension, it’s smooth riding over bumpy terrain 🔹 You’ll get a range up to 75-miles on pedal assist 🔹 And ride the Massive 20×4” fat tires over sand, snow, and dirt trails
If you’re looking for a rugged and adventure-ready folding e-bike, the Engine Pro 2.0 is the ultimate choice and one of E-Biking Today’s unexpected favorites!
#1: Aventon Sinch 2.5 – Best Overall Folding E-Bike🏅
Aventon Sinch 2 5
And now for the #1 best all-around folding e-bike of 2025… the new Aventon Sinch 2.5 (review)! Although it’s an upgrade from the Sinch 2.0, it’s new features have stepped it right up to the top of my list.
🔹 New side display, giving it a sleek design 🔹 New Hydraulic Disc Brakes and a suspension seatpost, offering security and comfort. 🔹 a 55-mile range – one of the longest for a folding e-bike, 🔹 4-inch fat tires, & front suspension for comfort and stability 🔹 Plus, the Torque sensor provides a smooth, natural ride
Aventon nailed the balance between performance, comfort, and style with the Sinch 2.5 upgrade. It’s perfect for anyone who wants a high-quality, long-lasting folding e-bike.
Final Thoughts: Which Folding E-Bike is Best for You?
Finding the perfect folding e-bike is all about matching your needs, budget, and riding style.
🔹 Want the lightest, most compact option? ➝ Ride1Up Portola 🔹 Looking for a fast, comfortable ride? ➝ Heybike Ranger S 🔹 Best budget-friendly & all-purpose? ➝ Lectric XP 3.0 🔹 Love off-road adventures? ➝ Engwe Engine Pro 2.0 🔹 Best overall folding e-bike? ➝ Aventon Sinch 2.5
I hope this guide helps you find your perfect e-bike! Now get out there and enjoy the ride.
Why would you want a belt-driven e-bike when a chain-driven one is the most common?
A carbon belt offers significantly less maintenance than a standard chain drive while offering the same or better performance. Belt drives are cleaner, don’t require lubrication, and last much longer than chains. So they’re definitely worth considering if you’re in the market for a new electric bike.
The best belt-drive electric bikes for 2025 are:
Ride1Up Roadster v3
KBO Hurricane
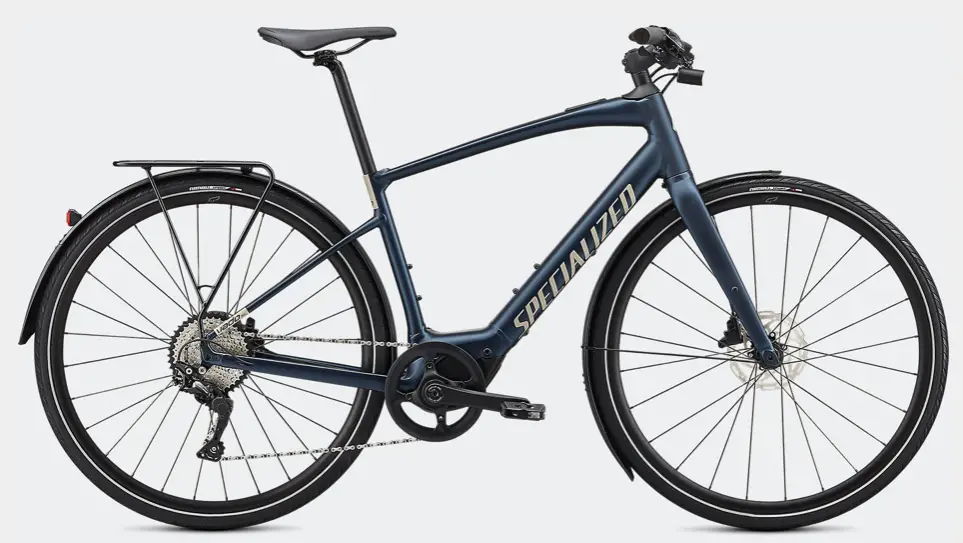
Specialized Turbo Vado 5.0 IGH
Specialized Turbo Como 4.0 Step-Through
Schindelhauer Heinrich Enviolo
Riese & Muller SuperchargerGT Rohloff
Luna Cycle Fat BABE (Bad Ass Belt ebike)
Stromer ST2
TENWAYS CGO600
VanMoof S3
Vvolt Alpha
Ready to find out more about each of these models and which e-bike brand is right for you? I’ve gathered all of the stand-out details as well as some of the disadvantages.
You’re sure to find the best bike equipped with a Gates carbon drive that fits your lifestyle.
1. Ride1Up Roadster v3
The Ride1Up Roadster is by far the least expensive and sleekest of all of the belt drive ebikes. At a price around $1295, this 39 lbs super lightweight model is hard to compare to others. With a fully integrated battery, ultra-quiet motor, and simple design this single-speed is one of the best belt e-bikes for the value.
Ride1Up Roadster v3 Step Thru
Its powerful Class Three 350W (500W peak) geared hub motor can take you up to 24 mph with pedal assist and a range of up to 30 miles with its 36V 7.0 Ah Samsung battery (35e Cells).
Surprisingly, despite its simplicity, it can still handle a payload capacity of up to 300 lbs. Even though it comes at an affordable price, it boasts a 5-level LCD display and an ergonomic road saddle. Plus, the frame comes in two sizes, fitting riders from 5’8″ up to 6’3″.
The downside is that shorter riders under 5’8″ won’t be able to reach the ground comfortably.
While it may be lightweight and fast, it can actually handle light off-road riding with its mechanical disc brakes and gravel-friendly tires, if you choose the gravel bike option.
Truly the only other electric bike with a Gates carbon drive in this price range is the KBO Hurricane (read about it below to compare further).
The KBO Hurricane has made it onto this list because it’s unique in the category of belt-driven electric bikes. The Hurricane is designed to be a “stealth” urban bike. Meaning that it’s made to be as sleek and stealthy as possible, with minimal signs to indicate that it’s electrically powered.
This is achieved by a very simple design, an integrated battery pack, and an integrated rear hub one-speed motor.
And, the Hurricane features no transmission because it’s a single-speed electric bike. However, it does have 3 power modes that determine how much pedal assist the rider is provided with.
This is one of the most well-priced e-bikes made to this high level of quality, as it only costs $1099.
The Hurricane is lightweight, equipped with a 345Wh Panasonic battery pack, and 350W hub motor, and has a range of 45+ miles.
Specialized Turbo Vado 5.0 IGH with Gates Belt Drive
3. Specialized Turbo Vado 5.0 IGH
Besides rocking a Gates Carbon Belt Drive, the Turbo Vado is unique in that it has advanced pedal technology not found in most other electric bikes.
The Como 5.0 internal geared rear hub motor allows you to predetermine your pedal cadence with its enviolo AUTOMATiQ stepless shifting. And because this system also uses a belt drive instead of a chain drive, you’ll get a smooth ride without messing with a chain or derailleur.
Thus, the Vado continuously adjusts itself to keep you pedaling at your preferred pace.
With a 250W motor, hydraulic disc brakes, and three frame sizes to choose from, a relaxed, comfortable ride on the Turbo Como 4.0 is in your future.
The Turbo Como uses the same stepless shifting technology as the Vado, but one feature might make this the perfect e-bike for you. With a step-through frame, you can get on and off easily, whether you need to dismount quickly or simply find it more comfortable to do so.
Plus, it has upright seating that allows riders to be comfortable throughout the ride with less stress on your hands, shoulders, and back.
Another benefit of the Turbo Como is the included Turbo System Lock that disables the motor and activates an alarm when motion is detected.
The next bike on the list of best electric bikes with belt drive is the Heinrich Enviolo by Schindelhauer.
Schindelhauer is a German e-bike manufacturer that was started by two friends right after leaving university in 2008. This is important to note because their idea was to create electric bicycles with belt drives right from the very start.
This means that all Schindelhauer bikes are designed from the ground up to function perfectly with belt drives, and without having been later adapted as a belt drive e-bike. This results in every component being as optimized as possible.
One of their bikes, The Heinrich Enviolo or the Hannah Enviolo, if you would prefer the e-bike designed for women, is their top-of-the-line model.
It features 8-speed automatic stepless transmission, a powerful Performance Line motor from Bosch, a 500Wh Bosch PowerTube battery, an Enviolo rear hub gear system, and a Bosch Kiox full-color control panel display and control system.
The battery pack is integrated into its frame and is equipped with lights, mudguards, a pannier rack, and a kickstand. Another huge benefit is that this model comes in three different frame sizes to perfectly suit riders of any height.
The belt drives on these e-bikes are the Gates Carbon Drive. The bike’s frame is aluminum to keep the weight as low as possible, and it features hydraulic brakes to ensure maximum safety.
This electric bike is the first on the list, not necessarily because it tops the list in terms of power or performance, but because this is the best all-around e-bike on the market that features a belt drive system.
The Heinrich/Hannah by Schindelhauer is an urban cruiser with a ton of heart and excellent craftsmanship. It’s a well-designed and well-thought-out bike with plenty of features.
There’s only one real disadvantage… this model costs $5015 USD (5195 EURO). Other than the high price, this is the perfect urban e-bike.
Riese & Muller Supercharger GT Rohloff with Belt Drive
6. Riese & Muller Supercharger GT Rohloff
The Supercharger GT Rohloff is described as a heavy-duty electric bike. It’s a rugged bike that is capable of handling almost any situation.
Riese & Muller is another German brand and they produce some of the most versatile electric bikes in the world.
The Supercharger is their flagship model, and it’s so named because of its extra-large battery capacity. It’s actually equipped with dual in-frame 500Wh Bosch battery packs, combining a total of 1000Wh of power and superb battery life! Dual batteries with 1250Wh are also now available!
This is significantly higher than most commercial electric bikes.
Additionally, the Supercharger features a 14-speed internal transmission system by Rohloff with a 1:5.6 gear ratio. This system allows the rider to change gears even while stopped. But it does also require the rider to stop pedaling to change gears, which can take some getting used to.
The stand-out features of this bike are the exceptionally large battery pack that affords it a 100-mile range, top speeds of over 50 miles per hour, heavy-duty tires and wheels, front wheel and seat suspension for extra ride comfort, two luggage racks, and high-end component quality.
However, there are some major drawbacks of the Supercharger… the e-bike’s 65-lb weight and the $9500+ price tag!
Otherwise, this ebike is perfect for all those who enjoy riding tours and long-distance adventures. It’s rugged both in looks and construction, and the all-terrain tires make it far more capable than most other e-bikes.
The Supercharger is equipped with a belt drive that is as tough as its other components.
The Fat BABE by Luna Cycle is the sleekest and most understated fat e-bike on the market. However, the sleek looks and design are not an indication of performance.
This is among the quickest and most powerful fat e-bikes on the market. The Fat BABE is equipped with a Bafang M600 800W motor, a 48V 13.5ah Panasonic GA battery pack, and a 5-way internal Sturmey Archer RSX-RK5 gear hub.
All of these features are internally mounted but fully accessible for repairs and replacements, which means that you can be as rough as you want on the Fat BABE without fearing the difficulty of making repairs.
This electric bike features a Gates Carbon belt drive, which is very simple to maintain. Notorious for their rugged simplicity and effective power transference, these belt drives are more efficient than chain drives and require far less maintenance. Carbon belt drives also last significantly longer than chain drives, which just adds to this fat e-bikes toughness and versatility.
The Fat BABE is equipped with piston hydraulic disc brakes and 4-inch thick fat tires for all-terrain.
The full-spec Fat BABE has a starting cost of $2750 and can be upgraded with a full-color display and quieter drive.
The ST2 is one of the most well-equipped, modern, and efficient electric bikes on the market. This model is equipped with features that almost no others have and is the ideal choice for those who seek the most technological versatility from their commuter e-bike.
The ST2 is equipped with a low-maintenance and durable Gates carbon belt drive, which sets it apart from other e-bikes in the Stromer range.
It’s unique among the others on this list (and placed at number 4 in the ranking) due to its clever digital connectivity. The Stromer ST2 is equipped with wireless connectivity to the OMNI app, which allows the rider more control of their bike than any other.
The app provides the rider with the ability to make individual adjustments to the motor settings, track mileage and personal performance, and localize the bike via onboard GPS. It even allows the ST2 to be locked and unlocked automatically via Bluetooth.
All of this is done via the riders’ smartphone, and the system is intuitive and simple to use.
Further, the ST2 has a 75 – 110 mile range (depending on the battery life), a rear hub-mounted electric motor that offers pedal assist up to 28mph, and a fully customizable riding position.
One of the major advantages of this Swiss-made bike is that it is fully configurable. You’re able to select the exact features that they require and choose from the list of compatible parts provided by Stromer.
This means that you can customize the range, power, and feature specifications of your own Stromer ST2 before purchasing it. Very few electric bike manufacturers offer this feature, and it’s a major plus for the ST2 overall.
As the lowest-priced ST model begins at around $5700 MSRP, be prepared to make a substantial investment.
The lightweight CGO600 is an electric commuter bike that’s hard to even recognize as an e-bike!
Weighing only 33lbs, its slim frame is super agile and able to maneuver through crowded city streets.
Besides likely being able to lift it with one hand, the CGO has the features most discerning e-bike riders wish for, a magnetic torque sensor and a Gates carbon belt. Not only can you set your pace, but the belt drive also offers more than 18,000 miles of worry-free riding!
The CGO performs with a 250W motor and up 43 miles of range. In the US, the motor is adjusted to a top speed of 20mph (while maxing out at the required 16mph in Europe).
With Medium and Large frames sized for riders 5’4” to 6’6”, you can get this belt drive bike in the US, EU, and the UK! Choose from four beautiful colors starting at $1699.
The VanMoof X3 is really something special. This is one of the most sought-after electric bikes in the world. These e-bikes are meant to be elite and for the discerning bike rider, but they are growing in popularity due to their high build quality and unique design features.
Although this bike isn’t designed to be the most powerful model on the market, it is built to be the most well-suited for city commuting. The X3 has a small, compact design but is also one of the most comfortable rides out there. Interestingly, it fits riders as small as 5’0″ and tall riders ups to 6’5″.
The X3 is also equipped with modern features such as temper detections, theft defense, and a lockdown mode that will shut down the bike in case of theft.
It also features a smart electric motor, an electronic shifting system, and a hydraulic braking system. But the shining feature of the X3 is the 504Wh battery with a 90+ mile riding range.
With a range of 20-40 miles and a 350W rear hub motor, it’s not the fastest or a long-haul e-bike.
However, priced starting at $1799, it features a Gates CDN belt drive, hydraulic disc brakes, 5 levels of pedal assist, and a lightweight battery pack. It also sports a rechargeable headlight and taillight.
Thanks to its simplicity, the Vvolt Alpha only weighs 44-46 lbs, depending on whether you choose the Alpha step-over or Alpha S step-through model. Additionally, each model comes in two frame sizes, so it fits just about anyone 4’8″ to 6’4″.
Plus, Vvolt comes with one of the longest warranties I’ve seen… 3 years without any mileage limits!
As electric bikes become more popular, the features that are available on the market are also increasing quickly.
The use of belt drives, rather than standard chain drives, is a huge part of this advancement in electric bicycle technology.
Belt-driven ebikes are still not as commonplace as many would like, but this is simply because belt-driven bikes are much more expensive than the alternative. For now!
However, if you are seeking one of the best belt-drive electric bikes, the models on this list are the best ones to consider.
🚨 Attention, E-Bike Riders: The 2025 Laws Are Here, and They’re Not What You Think! 🚨
If you love the freedom of riding your e-bike, you might want to sit down for this. California has dropped a regulatory bombshell on e-bike riders, and the changes could fundamentally alter the way you ride. New rules are cracking down on throttles, motor power, and battery safety, and it’s not just California—other states are watching closely and may follow suit.
So, what does this mean for you? For some, it means costly modifications to make their e-bikes legal. For others, it could mean an outright ban on their current ride. If you rely on your e-bike for commuting, recreation, or delivery work, these laws might create more headaches than solutions. But don’t panic just yet. I’m going to break down exactly what’s changing, why lawmakers are doing this, and what you can do to keep riding without getting hit with fines or penalties. Let’s navigate this mess together.
As of 2025, several U.S. states have implemented new regulations affecting e-bike riders. These laws aim to enhance safety and standardize e-bike classifications but have raised concerns within the riding community.
California has officially tightened the reins on e-bikes with Senate Bill 1271, and if you own a high-powered or throttle-assisted e-bike, you might be in for a rough ride. Here’s what’s changing:
1️⃣ No More Throttles on Class 3 E-Bikes
If you’ve been cruising on a Class 3 e-bike (which allows pedal assistance up to 28 mph), the days of throttle-powered acceleration are over. Under the new law, Class 3 e-bikes can only use pedal assistance—no throttle, no exceptions. That means if your bike has a throttle, you’ll either have to disable it or downgrade your bike to a Class 2 (which is limited to 20 mph with throttle).
Why the change? Lawmakers claim throttles on high-speed e-bikes make them too much like mopeds and could lead to more accidents. But here’s the kicker—there’s little data proving that throttles themselves are the problem. This means that many riders who rely on throttle boosts for quick acceleration (especially in traffic or hilly areas) are now left scrambling for alternatives.
2️⃣ Motor Power Limits Are Now Strictly Enforced
Technically, e-bike motors were already supposed to be capped at 750 watts, but there was some wiggle room. Many manufacturers designed motors that could peak higher under certain conditions, which gave riders more power when needed. That’s no longer allowed. The new law clearly states that any e-bike exceeding 750W is illegal for street use.
This means that some popular e-bike models, including high-performance commuter and cargo bikes, may suddenly be classified as illegal. If your e-bike falls into this category, you may be looking at costly modifications—or the risk of fines if you get caught riding it.
3️⃣ New Battery Safety Requirements (Fire Hazard Crackdown)
California isn’t just targeting speed and power—it’s also going after e-bike batteries. Due to an increasing number of lithium-ion battery fires (especially in New York City), the state is requiring all e-bike batteries to meet strict safety certifications.
While safety is important, this means many cheaper, budget-friendly e-bikes could be pushed out of the market if they don’t meet the new standards… and this means more expensive batteries for us.The law is aimed at preventing fires from low-quality, off-brand batteries, but if you’ve ever bought an aftermarket battery to extend your range, you may want to double-check that it complies with the new rules.
🚴♂️ What These New Laws Mean for Riders & How to Stay Ahead of Them
Let’s be honest—these laws feel like they’re punishing responsible e-bike riders more than they’re solving real safety issues. Isn’t it just a few riders making the rest of us look bad? And what about our safety? How about giving riders more dedicated bike paths? Or protecting us from illegal electric motorcycles marketed as “e-bikes”? Or making cars drive more responsibly? The truth is, taking away a throttle for commuters who need to get to work quickly removes their ability to ride with traffic and get through intersections safely.
Although there are lots of changes to be made that will improve safety for e-bike riders, let’s focus on what you can do right now
to protect yourself and keep riding legally:
✅ Check Your E-Bike Specs: If you own a Class 3 e-bike with a throttle, consider disabling it or reclassifying your bike to avoid fines. If your motor exceeds 750W, check with your manufacturer about legal modifications. Basically, you’ll need to decide whether you want a faster bike without a throttle, or one limited to 20mph WITH a throttle.
✅ Verify Your Battery: If you’ve bought a third-party battery, make sure it meets California’s new safety standards. Otherwise, you could face restrictions or even be forced to replace it.
✅ Stay Informed & Speak Up: These laws were pushed through with little rider input. Get involved with local advocacy groups, sign petitions, and contact your representatives to demand better e-bike policies that balance safety with rider rights.
E-Bike Advocacy Groups
Links to these e-bike advocacy groups below will help you get started.
The e-bike industry is already adapting to these evolving regulations:
Design Innovations: Manufacturers are developing models that align with new legal requirements, focusing on safety and compliance without compromising performance.
Advocacy Efforts: Industry groups and rider communities are engaging with policymakers to balance safety concerns with the practical needs of e-bike users.
🚴♂️ Other States Watching Closely—Could Your State Be Next?
California isn’t alone in tightening e-bike regulations. Other states, including New York, are considering even stricter laws.
New York’s Proposed Registration & License Requirements
A new law in NYC, called “Priscilla’s Law,” is proposing something that could be even worse—requiring all e-bike riders to register their bikes and get license plates. Lawmakers argue this will cut down on reckless riding and hit-and-run incidents, but it also creates more hurdles for everyday riders, especially delivery workers who rely on e-bikes.
The biggest concern? If a registration system is implemented, it could open the door for insurance requirements, similar to motorcycles. That would be a game-changer—and not in a good way.
🚴♂️ The Future of E-Bikes: What’s Next?
E-bikes are here to stay, but the industry is at a turning point. With stricter laws on the horizon, we’re likely to see:
📉 More expensive e-bikes due to compliance costs. ⚙️ More legal gray areas as states struggle to define e-bike classifications. 📜 More lobbying efforts from both safety advocates and e-bike manufacturers.
The good news? This new California E-Bike law is NOT a ban on electric bikes… they aren’t going anywhere. The demand for electric mobility is skyrocketing, and while these new laws might be frustrating, they’re not the end of the road. With enough rider support and industry pressure, we could see more reasonable e-bike laws in the future.
🚴♂️ Bottom Line: Don’t let these new rules stop you from riding—but stay informed, make adjustments where needed, and keep pushing for better policies. And most importantly… enjoy your ride!
Get a colorful frame (Amazon) for your favorite e-bike adventure photo!
Top 6 Accessories for Your E-Bike: Must-Have Gear for Comfort, Safety, and Performance
So, you’ve finally joined the e-bike revolution—welcome to the family! Whether you’re commuting, adventuring, or just zipping around town, you’re going to want a few must-have accessories to make your ride safer, more comfortable, and, let’s face it, a little more awesome. After all, owning an e-bike is about enhancing the riding experience, not just getting from point A to B.
But before you go throwing your paycheck at a thousand fancy gadgets, let’s narrow it down to just the top six accessories that will actually make a difference. Not useless gimmicks—these are essentials that every e-bike owner will appreciate.
Helmet – Because Your Brain is Kinda Important
Look, we get it. You’re a free spirit, and helmets can feel like a fashion compromise. But unless you’re looking to test your skull’s durability, a helmet is the number one accessory you need. E-bikes are faster than traditional bikes, meaning accidents can have greater consequences. That’s why you need a helmet designed specifically for e-bikes—preferably one that meets NTA-8776 standards for high-speed impacts.
Bonus points if it comes with built-in lights, ventilation, and a sleek design that doesn’t make you look like a mushroom. Consider helmets from brands like POC or Bell that offer high-end protection with the added benefit of comfort.
Pro Tip:
Get a helmet with MIPS (Multi-directional Impact Protection System) for added safety.
Built-in LED lights? Even better for visibility during night rides.
High-Quality Bike Lock – Because Thieves Love E-Bikes
If there’s one thing thieves love more than free Wi-Fi, it’s an unlocked e-bike. And trust me, e-bikes are prime targets—because let’s face it, they’re awesome, expensive, and easy to flip.
That’s why you need a strong, dependable lock. Consider a U-lock from brands like Kryptonite or ABUS. Even better, double up with a chain lock to give prospective thieves a headache.
Security Tips:
Don’t just lock the wheel—secure the frame.
Add a GPS tracker, just in case.
If you’re feeling extra paranoid, get an alarm system that warns potential thieves with an ear-piercing screech.
Lights – Because You’d Like to Stay Visible
If your e-bike doesn’t come with built-in headlights and taillights, fixing that should be at the top of your list. Even if it does, you’ll want to make sure they’re bright and effective. A good set of front and rear LED bike lights will ensure that drivers, pedestrians, and fellow cyclists actually know you exist.
For maximum brightness, go for a rechargeable LED setup and aim for a minimum of 600 lumens for the front light. Rear lights should be red, flashing, and impossible to ignore.
Bonus Ideas:
Underglow lights if you want to look extra cool (and remain visible from all angles).
Helmet-mounted lights for added visibility at eye level.
Brake-activated rear lights that mimic automobile design.
Phone Mount – Because Holding Your Phone While Riding is Dumb
Checking your phone while riding is like texting while driving—just don’t. Instead, get yourself a sturdy, shock-resistant phone mount for easy access to navigation and ride stats. Some even come with built-in wireless charging, so your phone doesn’t die midway through that scenic route.
What to Look For:
Aluminum construction for durability.
Adjustable grip to fit different phone sizes.
360-degree rotation, so you can glance at maps without breaking your neck.
Suspension Seatpost – Your Butt Will Thank You
Bumpy roads? Rough terrain? Long rides that leave you feeling like you’ve been sitting on a pile of rocks? Enter the suspension seatpost—a game-changer for comfort.
A good suspension seatpost absorbs shocks and vibrations as you ride, making longer rides far more enjoyable. It’s not just for mountain bikers—if you’re riding an e-bike on city streets riddled with potholes (looking at you, New York), then this is an investment worth making.
Why You Need One:
Improves ride comfort by reducing impact fatigue.
Adjustable suspension tailored to your weight and riding style.
Makes your e-bike feel a whole lot smoother.
Portable Air Pump – Because Flats Happen
Popping a flat tire is just a rite of passage for cyclists. It’s inevitable, but at least you can be prepared. A compact, battery-powered portable air pump can save you from an otherwise annoying walk to the nearest bike shop.
Some pumps are even smart enough to detect the air pressure and automatically fill your tires to the correct PSI. If you don’t want to mess with bulky floor pumps or rely on gas stations, this one’s a no-brainer.
Extra Tips:
Go for an air pump with an LCD display to easily check pressure.
If possible, carry a tire sealant like FlatOut to prevent minor punctures.
Keep a patch kit handy for emergencies.
Final Thoughts
Riding an e-bike can be one of the best decisions you’ve ever made—but only if you’re prepared. These essential accessories aren’t just for luxury—they enhance safety, convenience, and comfort, ensuring that your e-biking experience is as smooth and enjoyable as possible.
Consider this your official checklist before you hit the road. Get the right accessories, ride safely, and look awesome doing it. After all, isn’t that the point?
FAQs
What’s the best lock for an e-bike? A solid U-lock paired with a chain lock is ideal. Brands like Kryptonite and ABUS have top-rated models that will give thieves second thoughts about messing with your ride.
Do I really need an air pump if I ride in the city? Absolutely! Potholes, glass shards, and debris make city streets notorious for tire damage. A portable air pump lets you inflate on the go and avoid a dreaded long walk home.
Is a phone mount worth it if I don’t use my phone much while riding? Yes! Even if you don’t check your phone constantly, a mount allows for safe navigation, hands-free music control, and tracking your ride stats in a non-distracting way.
What should I look for in a helmet for e-biking? Aim for an NTA-8776 certified helmet, preferably with MIPS technology, built-in LED lights, and good ventilation for a mix of safety and comfort.
Can I use regular bike lights on my e-bike? You can, but e-bikes move faster than traditional bicycles, so you’ll want something with higher brightness—at least 600 lumens for the front light—to ensure visibility.
Now, go trick out your e-bike with the right accessories and enjoy the ride!
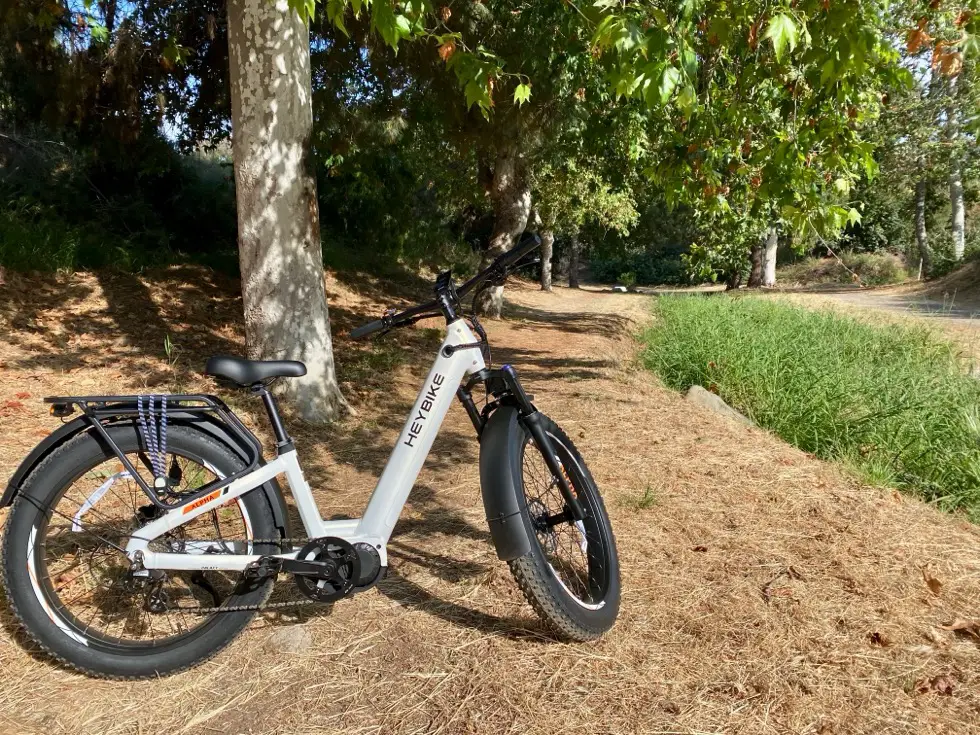
Heybike-A headlight and brake light are essential!
How to Turn On the Light On An Electric Bike?
So, you’ve got yourself an electric bike. Congrats! No more huffing up hills or arriving at work looking like you just ran a marathon. But now you’re stuck wondering… how do I turn on the lights? Not to worry—I’ve got you covered. Let’s break it down in the simplest way possible, so you don’t have to ride around in the dark like some mysterious cycling ninja.
Understanding Your E-Bike’s Lighting System
Before diving into the “how-to,” it’s important to know what kind of lighting system your e-bike has because—surprise!—not all e-bikes are the same. Some come with built-in lights that connect directly to your bike’s battery, while others require separate attachments or even an app to control them.
Integrated Lights: These are wired directly into your e-bike’s battery and can usually be controlled from the bike’s control panel or handlebar buttons.
Removable Bike Lights: If your e-bike didn’t come with built-in lights, you might be using battery-operated ones that you attach separately.
Smart Lights: Some high-tech e-bikes allow you to control the lights via a mobile app, offering features like brightness adjustment and automatic activation based on ambient light.
Dynamo-Powered Lights: These lights work using the bike’s motion—pedal, and they turn on automatically (because who doesn’t love free electricity?).
Ride1Up electric bikes have both front and rear lights.
General Steps to Turn On the Lights on an E-Bike
Since different e-bikes operate slightly differently, let’s go over the most common methods to activate your lights.
Step 1: Power On Your E-Bike
Before anything else, your e-bike needs to be turned on. If it has a power button, press it. If you need a key to activate it, turn the key in the ignition slot. Without power, you’re just a regular biker with a very fancy (and heavy) bicycle.
Step 2: Find the Light Control Button
Check your e-bike display for a “light” symbol (like you see above) or hold the + button down for a few seconds.
Most e-bikes have a dedicated button for the lights. Here’s where you should look:
On the handlebar control pad—marked with a lightbulb symbol or just the word “Light.”
On the bike’s display panel—if you have an LED control screen, check for an option there.
Near the headlight unit itself—some front lights have a small button on them.
Step 3: Press (or Hold) the Light Button
Now, this is where things vary, depending on your bike:
Hold the “+” Button: Many e-bikes, especially models from Lectric, Rad Power Bikes, or Bosch, turn their lights on when you press and hold the “+” button on the control pad for a few seconds.
Press the Light Symbol Button: Some bikes have a clearly marked light button that just requires a simple press.
Use a Mobile App: If your bike works with an app, open it and toggle the light feature on.
Turn on Manual Lights: If your bike has detachable lights, they likely have a physical switch on them.
Once the lights are activated, your display screen may show a small icon indicating that the lights are on. If you don’t see an icon, do what every troubleshooting guide suggests—turn it off and back on again. You might also notice the display dim when the lights are turned on.
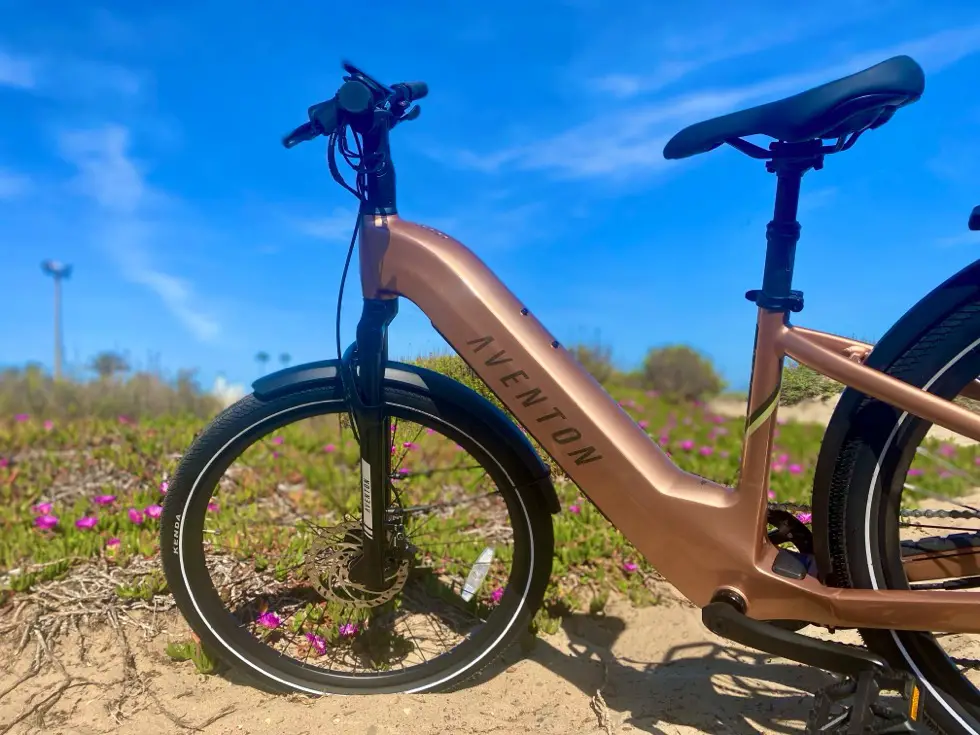
Some electric bikes, like the Aventon Pace 500.3, include brake lights with turn signals to let cars and other cyclists know where you are headed.
How to Turn Off the Lights
Realized you don’t need the lights on during your daytime joyride? Turning them off is just as easy!
If you turned them on by holding the “+” button, hold it again to switch them off.
If your bike has a light switch or button, press it again to deactivate the lights.
If you used an app, well… tap that glowing light icon again.
What If Your E-Bike’s Lights Aren’t Working?
Ah, the joys of technology—when it works, it’s great. When it doesn’t, cue frustration. If your e-bike’s lights refuse to cooperate, here’s what to check:
Battery Level: If your e-bike battery is running low, some systems automatically disable lights to conserve power.
Wiring Issues: If you’ve been on bumpy rides, connections might have loosened.
Blown Bulbs: Yes, even LEDs can fail, though rarely.
Faulty Switch or Button: Try pressing firmly or cleaning around the button if it feels sticky.
If all else fails, consult your bike’s user manual (or call the manufacturer and pretend you didn’t already try turning it off and back on).
Tips for Safe Night Riding
Now that your lights are shining bright, here are a few extra tips to make sure you’re visible and safe when riding at night:
Use both front and rear lights—you need to see and be seen.
Consider adding extra lights or reflectors, especially if you ride in traffic-heavy areas.
Adjust the headlight angle to light up the road ahead without blinding pedestrians.
Wear reflective clothing—because why not look like a human glow stick?
On the Heybike Tyson, a large headlight comes on automatically for safety.
Frequently Asked Questions
Why don’t my e-bike lights turn on? Make sure your bike’s battery is charged, check wiring connections, and ensure you’re pressing the correct button. If everything seems fine but they still won’t work, it might be time for a repair or new lights.
Do all e-bikes have built-in lights? Nope! Some e-bikes come with integrated lighting, but others require you to attach lights manually. Always check your bike’s specs before assuming you have built-in lights.
Can I leave my e-bike lights on all the time? Yes, but if your lights run off the same battery that powers your motor, leaving them on for extended periods could drain the battery faster—something to keep in mind for long rides.
Are there automatic e-bike lights? Yes! Some electric bikes have light sensors that automatically turn on when it gets dark. It’s like having a tiny personal assistant that cares about your nighttime visibility. But, be careful, the light may come on when storing the bike at night!
Final Thoughts
Turning on the lights on your electric bike isn’t rocket science—though it might feel like it the first time you try. Whether your bike uses the trusty “+” button trick, a dedicated switch, or an app, the key is to familiarize yourself with your specific model. Now, go forth and ride safely… and please, don’t be the person biking in pitch-black darkness.
Fantasizing about buying an electric bike? Before you do, there are some crucial things you need to know—things I wish someone had told me before I got into e-biking. So, I’ll share 15 things I’ve learned from my own experience, including mistakes I made, lessons I’ve picked up along the way, and tips to help you make the right decision.
Plus, I’m sharing five ways to get the most for your money when buying an e-bike, so keep reading!
15 Things No One Tells You About Electric Bikes
1. Not All E-Bikes Are Created Equal
When I started researching to buy my first e-bike, I assumed they were all pretty similar. But after riding a few, I quickly realized there’s a huge difference between pedal assist and throttle e-bikes, between a powerful motor and a weak one, and between a comfortable ride and one that feels like a brick on wheels.
🔹 My Tip: Don’t buy just based on looks, brand names, or because a friend loves theirs. Make sure the bike actually suits your riding style and needs. I’ve left you a couple links to help you learn more about e-bike differences under this video.
2. Battery Life Isn’t Always What’s Advertised
E-bike companies love to claim that their bikes get 50, 60, or even 100 miles per charge, but in reality, real-world range is usually much lower—especially if you use throttle mode a lot, ride on hills, attempt to conquer rough terrain, or weigh more than the 150 pound rider that e-bike brands use to test range.
🔹 My Tip: Lower your expectations a bit. Expect about 60-70% of the advertised range under normal conditions. If range is a priority, get a bike with a bigger battery than you think you’ll need.
3. Weight Matters – And You’ll Feel It
E-bikes are heavier than traditional bikes, and I found this out the hard way when I tried to lift one onto a bike rack for the first time. Some are nearly impossible to carry upstairs or even put on a bike rack. And if your battery dies mid-ride, pedaling a 70-pound bike can be exhausting.
🔹 My Tip: If you need to transport your bike often, stick with one weighing less than 60 pounds or whatever you can handle. And if you’ll be lifting it onto a rack, practice before you go on a big trip!
I assumed an e-bike would be as easy to maintain as a regular bicycle, but the motor, battery, and wiring add a whole new layer of complexity. While I still check my tire pressure and clean the chain, I also have to be careful about keeping electrical connections dry and updating firmware or an app on some models.
🔹 My Tip: Learn some basic e-bike troubleshooting, like how to reset your controller, check for loose connections, and properly store your battery in the winter.
5. You Might Need a Special License or Insurance
I was surprised to learn that some states and cities regulate e-bikes differently. Some require a license or registration for high-speed models, and certain bike paths don’t allow throttle-controlled e-bikes at all.
🔹 My Tip: Check your local e-bike laws before buying! It would be awful to get a bike you can’t legally ride where you live.
6. Comfort is More Important Than Speed
When I got my first e-bike, I was focused on speed and power, but after a few long rides, I realized that comfort is way more important. A bike with bad ergonomics can leave your wrists sore, back aching, and butt numb.
🔹 My Tip: Invest in a good seat and make sure the handlebars and pedals fit your body. Don’t just chase top speed!
I’ve tested budget e-bikes that seemed like a great deal, but many of them use cheap motors, weak batteries, and poor-quality brakes. The last thing you want is a bike that breaks down within months.
🔹 My Tip: Don’t go too cheap. Stick with reputable brands that offer solid warranties and replacement parts. Expect to spend between $1000 and $2000 for a quality ride.
8. E-Bikes Can Still Give You a Workout
A lot of people think e-bikes are just for lazy riders, but I actually ride more often and for longer distances because of pedal assist. You can still get a great workout by keeping the assist level low.
🔹 My Tip: If you want exercise, use pedal assist on level 1 or 2, and save throttle mode for steep hills or long rides. Or, turn off the assistance and you’ll quickly discover an intense workout.
9. Security is a Big Issue
After seeing countless stories of stolen e-bikes, I realized I needed a serious lock—not just a cable lock, but a heavy-duty U-lock or chain lock. And, two is always better than one.
🔹 My Tip: Get two solid locks and park in safe areas. If you can’t park where it’s safe or you’re especially worried, consider a GPS tracker hidden inside the frame or battery case. And consider ebike insurance. Is your investment worth about $100 a year?
10. E-Bike Accessories Are Essential
The first time I rode my e-bike at night, I realized the built-in light was weak and I could barely see the road. That’s when I learned how important good accessories are.
🔹 My Tip: Upgrade your lights, add mirrors, and get fenders if you plan to ride in wet conditions or on loose terrain. A few small upgrades can greatly improve safety and comfort.
Riding into strong wind feels like climbing a mountain, even on an ebike and hills will suck the life out of your battery if you’re not careful.
🔹 My Tip: If you live in a hilly area, get a bike with at least a 500W motor or a mid-drive motor, which handles hills better. Consider your size and weight before deciding a 500W motor is enough.
#12 of the 15 Things No One Tells You About Electric Bikes…
12. E-Bikes Can Be Hard to Repair Locally
Not all bike shops service e-bikes, and some brands don’t have spare parts available, which can leave you stranded.
🔹 My Tip: Before buying, check if a local shop services your brand or make sure the manufacturer has good customer support.
13. Your Charging Habits Affect Battery Lifespan
I’ve learned that how you charge your battery can make a huge difference in how long it lasts.
🔹 My Tip: Never let your battery fully drain to 0%, and avoid leaving it plugged in overnight. Charge it when it gets to around 20-30%. I have MANY more battery tips for you, which I’ve linked below the video.
14. Riding in the Rain? Know the Limits
Most e-bikes are water-resistant, not waterproof. Riding through deep puddles or in heavy rain can damage your motor or controller.
🔹 My Tip: If you ride in the rain, get a battery cover and make sure all your connections are sealed properly. Or spend more for an e-bike that is waterproof-rated. And, don’t ever use a high pressure hose to wash your ebike.
15. The Test Ride Is More Important Than the Specs
I used to think I could just look at the specs online and know which e-bike was best, but after testing and reviewing different models, I’ve realized that real-world feel is far more important than numbers on a page.
🔹 My Tip: Read or watch electric bike reviews! If possible, test ride at least three different e-bikes before deciding. What looks good on a website might not feel right when you ride it.
Now, after testing and reviewing e-bikes, I’ve learned a few smart ways to maximize your budget when buying an electric bike.
1. Prioritize Features That Matter Most to YOU
It’s easy to get caught up in fancy specs, but not every feature is necessary for every rider. Do you really need a 750W motor if you’re just commuting on flat roads? Or full suspension if you never go off-road?
Make a list of must-have features vs. nice-to-haves before you start shopping. Spend your money on the features you actually need, like a high-quality battery, good brakes, and a comfortable fit.
2. Buy from a Reputable Brand with Good Support
A cheap e-bike from a no-name brand might save you money upfront, but if it breaks down and you can’t get replacement parts, you’ll end up spending more in the long run. So, stick with brands that offer warranties, spare parts, and solid customer support.
3. Consider a Previous Year’s Model or Open-Box Deal
Just like with cars, last year’s e-bike models often go on sale when the new ones arrive. Many are still excellent bikes. Check for end-of-season sales, demo models, and clearance deals from reputable retailers. You could save hundreds of dollars!
4. Don’t Overspend on Battery Capacity If You Don’t Need It
It’s tempting to buy the biggest battery possible, but you might not need it. Instead, calculate how far you actually ride daily, then choose a battery that gives you at least 20% more range than you think you need.
5. Buy a Mid-Range Bike and Upgrade Parts Later
Instead of stretching your budget for the most expensive model, consider getting a solid mid-range e-bike and upgrading the saddle, tires, or lights later on.
Final Thoughts
Now that you know 15 things no one tells you about e-bikes, you can look forward to getting the best electric bike! Your rides will be tailored just for you, based on real life experience. Now, get out there and enjoy your ride! 🚴⚡
Riding an electric bike for the first time is exhilarating! But, your mind is probably buzzing with questions: Will I look like a fool if I don’t know how to start? What if I trip or fall getting off the bike? What if my battery dies mid-ride? Will I lose control? Am I using the right gear? Don’t sweat it. I’ve got you covered with 13 essential tips that’ll make you look and feel like a pro from your very first ride.
I’m Lisa at E-biking Today and I’ll admit that I’ve made some embarrassing mistakes when riding an ebike. Today, I’m sharing essential tips to keep you from feeling foolish and embarrassed as a new ebike owner… and I’m also letting you in on some of the shameful, no good, very embarrassing mishaps I had as a new ebike rider.
13 Tips for New E-Bike Riders
1. Know Your E-Bike’s Controls Before You Ride
Imagine sitting on your new e-bike and fumbling to find the power button while everyone watches. Once you’re powered on, you take off, but you don’t move forward quick enough, lose balance and start to fall. You awkwardly try to get off the bike while keeping it from falling over. Embarrassing, right? Don’t worry. You can avoid all of this!
First, take five minutes to locate and understand the essentials: the power button, pedal-assist levels, and brakes before you even get on your ebike. Then, get familiar with your display and be sure you can easily find the pedal assist controls before you ride.
Pro Tips: Practice switching pedal-assist levels while stationary so you don’t panic mid-ride. Begin on pedal assist 1 and only increase to the next level once you feel comfortable and safe. Don’t start off riding uphill or downhill. Stick with a level surface using levels 1 or 2 only for your first few rides.
My Embarrassing moment: I thought I could ride up a steep dirt hill on my new e-bike, only to panic when I didn’t have enough power to succeed. So, I tried to stop, but instead lost control and slid backwards down the hill with the bike on top of me. Other than a few scratches and a hole in my pants, I was fine. So, yeah, stick with riding on flat, solid ground as a newbie.
2. Learn How to Mount and Dismount Gracefully
New riders often struggle to get on and off their e-bikes smoothly, especially since they’re heavier than standard bikes. Practice stepping on and off while holding the brakes to steady the bike. Avoid leaning too much to one side—it’s a quick way to lose your balance.
Pro Tips: Practice getting on and off your bike, even if it has a step-through frame. You can still get tripped up if you don’t lift your leg high enough..
And of serious importance, make sure your hands won’t accidentally hit the throttle while mounting your ebike.
3. Master the Art of Braking
E-bikes are heavier and faster than regular bikes, so stopping isn’t as intuitive. Practice using both front and rear brakes evenly to prevent skidding or flipping over. Remember: the front brake is stronger, so squeeze it gently.
Pro Tips: Always brake early when approaching a stop—e-bikes need extra distance to slow down. And practice using your brakes before you get into traffic or around other people or objects.
My embarrassing moment: instead of using the brakes, I tried to maneuver my e-bike around a curb. Needless to say, I didn’t make it and fell flat in front of someone sitting in a car. Shame. Shame. Shame.
4. Adjust Your Pedal Assist Wisely
Pedal assist feels like magic, but it’s easy to overdo it. Keep it low (level 1 or 2) in crowded areas or when riding at slow speeds. Cranking it up to max in the wrong situation can make the bike lurch forward unexpectedly. Increase power prior to riding uphill or when crossing a street, but avoid these situations until you feel confident.
Pro Tip: Start at the lowest assist level and gradually increase it as you gain confidence. Always slow down around pedestrians.
5. Dress for the Ride
Baggy pants caught in the chain? A flip flop grabbed by the spokes? Avoid these rookie mistakes by wearing fitted clothing and proper footwear. No, you don’t have to wear cycling gear, just something comfortable and not baggy. Your shoes should be sturdy and secured to your feet protecting them in an accident. And safety before style people… e-bike helmets are NOT an option.
Pro Tip: To increase visibility, keep your e-bike lights on and use reflective gear when riding in traffic.
6. Practice Starting and Stopping
Starting from a complete stop can be awkward enough, so don’t even attempt it on a slight incline. Choose a flat, quiet area to practice starting smoothly without wobbling. The key is to pedal lightly and use the lowest pedal-assist level.
My Pro Tip: Learn to use your gear shifts. Shifting to a lower gear before stopping will make starting again easier.
7. Respect the Throttle
If your e-bike has a throttle, resist the urge to go full speed as a new ebike rider. Throttling too hard can lead to sudden, jerky movements that may throw you off balance. Practice using the throttle gently and consistently.
Pro Tip: Use the throttle sparingly to preserve battery life. Afterall, you’re on an electric bicycle and pedaling is always nice.
I may get in trouble for telling you this, but here’s Marc’s embarrassing moment: He laid on the throttle too hard up a steep dirt path and did an unexpected wheelie. Fortunately, he’s strong and was able to catch the bike before it went over his head.
8. Plan Your Route
Not all roads and trails are e-bike friendly. Before heading out, research your route for bike lanes, trails, and charging stations. Avoid heavy traffic areas if you’re still gaining confidence.
Pro Tip: Apps like Komoot or Google Maps can help you find e-bike-friendly paths.
9. Understand Battery Range
Don’t assume your e-bike will magically cover 50 miles just because the manufacturer says it has a range of 50 miles. Factors like terrain, pedal assist level, throttle usage, and rider weight affect battery range. Discover your true range by keeping track of mileage while on short rides and always plan a buffer.
Pro Tips: Charge the battery fully before every long ride and use the lowest pedal-assist level whenever possible to conserve battery.
Also,carry your charger with you or invest in a second battery if you’re planning long rides.
10. Secure Your E-Bike
E-bikes are an investment, and they’re a magnet for thieves. Never leave your bike unattended without two or more high-quality locks, like this massive chain lock. For extra peace of mind, consider a GPS tracker or Apple Airtag.
Pro Tip: Consider affordable e-bike insurance… the truth is, professional thieves will take your bike if they want it. You can expect to pay around $100 per year depending on the price of your e-bike and location.
11. Maintain Your E-Bike
A creaky chain or low tire pressure can ruin your ride and your neighborhood reputation. Keep your e-bike in top shape by checking tire pressure, brakes, and chain condition before every ride. Schedule regular tune-ups with a local bike shop.
Pro Tips: Get an air pump with a gauge that displays tire pressure levels. You don’t want to get a pinch flat because the pressure was too low.
Also, oil your chain at least every other month. Use a “wet” lubricant for humid or rainy areas and a “dry” one for arid locales.
12. Kick the Kickstand!
Nothing screams “rookie” louder than trying to pedal away with the kickstand still down. Not only is it embarrassing, but it can also throw you off balance or damage your bike. Always double-check that your kickstand is fully retracted before you hit the road.
Pro Tip: Develop a pre-ride routine: check the kickstand, brakes, and battery before starting every ride. A quick glance can save you from an awkward moment!
And the last of the 13 Must-Have Tips You’d be Embarrassed to Miss…
13. Ride With Confidence
One more tip for newbie riders? Own the road (or trail)! Hesitation can make you look unsure and put you in dangerous situations. Ride with purpose, signal your turns, and follow traffic laws.
Pro Tip: Practice on quiet streets or trails until you feel comfortable riding in busier areas.
Final Thoughts
Your first few outings as a proud e-bike owner should be full of joy, not embarrassment. With these 13 must-have tips as a new ebike rider, you’ll avoid rookie mistakes, ride safely, and build your confidence. Remember, every seasoned rider was a beginner once—what matters most is that you’re out there… enjoying the ride!