
If you’ve thought about converting your bike to an electric bike, you’re not alone. After all, you already have a good bike that’ll just sit and collect dust once you have your new, way more fantastic e-bike. So why pay a lot more money to have a second, even more expensive bike, right?
But you probably have a lot of questions as to whether converting your regular bike to electric is really something you want to do and can do yourself.
You can convert your regular bike to an electric bike by purchasing a standard conversion kit or an “all-in-one” electric wheel kit. Converting your regular bike can cost less than buying a new e-bike and is relatively easy but will require time, knowledge, and patience.
Whether you decide to convert your old bike or not depends on a lot of factors. So I’ve researched and pulled together everything you need to know in this conversion guide so that you can make an educated decision. Just know that no matter what you decide to do, having an e-bike will provide endless enjoyment and convenience.
Follow this conversion guide to learn everything you need to know about converting your regular bike to an electric bike. Here’s what you’ll discover:
- Why Convert Your Bike to Electric
- How Do I Convert My Bike to an Electric Bike?
- Where Can I Find EBike Conversion Kits and How Much Will the Parts Cost?
- Best Electric Bike Conversion Kits
- What Should I Know Before Converting My Bike to Electric?
- Making an Electric Bike Conversion
Why Convert Your Bike to Electric?
You may be on the fence about whether to buy a new electric bike or convert your existing one.
Buying an electric bike is easy, but it might not be what you want in terms of style and functionality. Plus, it’ll cost a great deal more to buy a brand new e-bike than to convert your own bike to electric. Converting can also give you the control you want over your ride’s performance.
Then consider that, if you’ve already spent several hundred dollars or more on a nice bike, that adding another $700 to make it completely electric is still less than buying most quality e-bikes.
And certainly, if you want to go faster and farther on your bike or now find that you need electronic assistance to help you get uphills or across long-distances, then converting your current bike to an e-bike makes sense.
But converting also takes time, money, and patience – things that many people don’t have these days! Ultimately you’ll need to weigh out all of this before making any decisions. Besides, as technology for electric bikes continues to advance rapidly we might find even better options for both converting and buying.
Learn more about the purpose of electric bikes here:
11 Ways E-Bikes Are Different Than Normal Bikes
How Do I Convert My Bike to an Electric Bike?
If you’re looking to convert a conventional bicycle into an electric bike, one of the most common methods is by adding a hub motor to the front or rear wheel. This conversion will leave the original components of the bike untouched, while only changing out or adding a few parts including a motor, battery, and controller.
By leaving all other components untouched and only changing up parts such as hubs or controllers (find out if you need a dual mode controller), this method can appear seamless.
However, taking a conventional hub and converting it into a motorized one isn’t quite as simple as that. For starters, rebuilding wheels after taking them apart can be complicated. You’ll need to reinstall the spokes into your wheel. Not only does this task require patience but precision when matching up spoke lengths and using the right tool to get the correct tension.
Further, you might even need to get an entirely new wheel that can handle the added weight of the motor and the work (or torque) of the engine, which is required to pull the bike forward. If you’re good with mechanics, need a project, or enjoy getting your hands dirty, this may be no problem for you.
But there’s good news for everyone else! Many companies are now selling electric wheels that already contain the hub motor, battery, and of course the rim and spokes… all in one unit! This electric wheel can replace the front or back wheel, making it much simpler to convert your bike to electric.
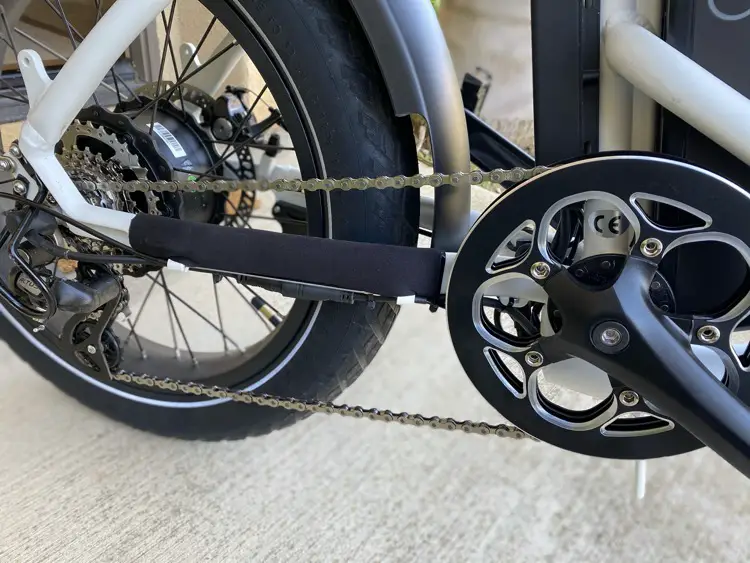
Although converting to electric with a wheel conversion kit is a good option for many, you might prefer to get an e-bike conversion kit with a mid-drive motor which is more efficient and gives you a better ride, especially if you have a road bike.
However, this is a different type of conversion that doesn’t use the wheel but instead adds a motor in the middle of your bike. This “balance” is why some people prefer a mid-drive motor and why you can get a smoother ride.
You can also do a conversion with a couple of other, less common, types of electric bicycle conversion kits. These are discussed below.
Find out more about the mechanics of an e-bike before converting:
How E-Bikes Work: A Guide to the Basics
Where Can I Find Conversion Kits and How Much Will the Parts Cost?
Conversion kits are easy to find since they’ve become more popular. However, it can still be difficult to choose one. Not only will you look at the price and the general types of kits, but you’ll also want to consider other electrical features that can be added such as an LCD display, headlight, or throttle.
Different Types of Conversion Kits for Electric Bikes
| Conversion Kits by Type | Average Price Range | |
| Friction Drive | Under $300 | |
| *Mid-Drive (with or without battery) | $350-$1200 | |
| Concealed | $500+ | |
| *All-in-One Electric Wheel (Hub Motor) | $200-$600 |
- Friction Drive Kits
This is probably the lowest-cost option because it’s simple and not too efficient. But you can still get your bike converted and increase the power of your bike. If you want an e-bike that’s more similar to what you’d buy new, then this is not it. - Mid-Drive Motor Kits
The great thing about adding a mid-drive motor to your bike is that it attaches low and to the middle of your bike frame. This helps you keep balanced and have a smooth ride. It’s also more like an e-bike you’d purchase. This type of motor is fairly popular on many e-bike models because of its smooth ride.
However, it isn’t covered and is therefore exposed to rain, dirt, rocks, and sand more easily. So, if you’re a rider who enjoys rough trails, this type of conversion kit may not be the best choice. Instead, it’s often chosen for road bikes. - Concealed Conversion Kit
This kit can be added to your bike in a way that makes it less noticeable, and perhaps more professional. Both the motor and the battery are hidden inside the seat tube of the bike. So, they are well protected from the elements.
However, this is probably the most expensive conversion option. After all, you pay for beauty and efficiency. Further, because it’s fitted inside your bike seat, it’s also more difficult to install. - All-in-One Electric Wheel (Hub Motor Conversion Kit)
Because these replace your bike’s entire wheel with one that includes a hub motor and gears, it’s not surprising that this has become a very common choice in e-bike conversion kits. It’s easy and streamlined and you can even choose a rear or front wheel.
Generally, choose a rear hub motor wheel kit for good traction and riding your bike off-road. Otherwise, choose a front wheel kit for smoother riding overall, as the weight of the motor is better distributed. Either way, hub motor kits are probably what you’re looking for.
How to Select a Battery and How Much It Costs
Unfortunately, most conversion kits don’t come with batteries, unless you’re opting for the more “concealed” kits. So, you’ll need to figure in the cost of the battery when comparing your options.
E-bike batteries range from around $200 to almost $1000! If you want a reasonably powerful and efficient battery without getting top-of-the-line, you can get one for closer to $500. However, you’ll find many lower-priced options that might work for you.
Prices depend primarily on whether it’s a well-known brand and what the capacity of the battery is.
E-bike batteries are typically lithium-ion and costs go up as the voltage (power and speed; V) and capacity (how far you can go on a charge; Amps or Ah) increase. By multiplying these two factors (V times Ah), you’ll get the total Watt-hours (Wh).
Basically, what you need to know is that if you want to go faster and farther, you’ll want to get a bigger and more powerful battery. So the higher the Volts (V) and Amps (Ah), the better you’ll be able to achieve this. Oh, and this means you’ll need to pay more… unless you have an old battery to rebuild.
Thinking about converting to electric? Compare the cost with new e-bike prices first:
Best Electric Bike Conversion Kits
Although there are different types of conversion kits, this guide will show you the best electric wheel kits with a hub motor and mid-drive kits since they are the most common. If you’re looking for a concealed kit, you should go to professional bike retailers who can give you the best advice.
But for most of us, these are the best ebike conversion kits:
| Electric Bike Conversion Kits | Motor | Battery Included | Price | |
| JAXPETY 26″ Front Wheel Kit | 500W Hub Motor | No | $225 | |
| EBIKLING 700C Waterproof Wheel Kit | 1200W Hub Motor | No | $379 | |
| BAFANG 20″ Rear Wheel Kit | 500W Hub Motor | Optional | $285 | |
| BAFANG BBS02B Mid-Drive Conversion Kit | 750W Mid-Drive Motor | Optional | $387 | |
| BAFANG BBS02B Mid-Drive 44T Chainring | 500W Mid-Drive Motor | Yes (for this price) | $714 |
JAXPETY 26″ Front Wheel
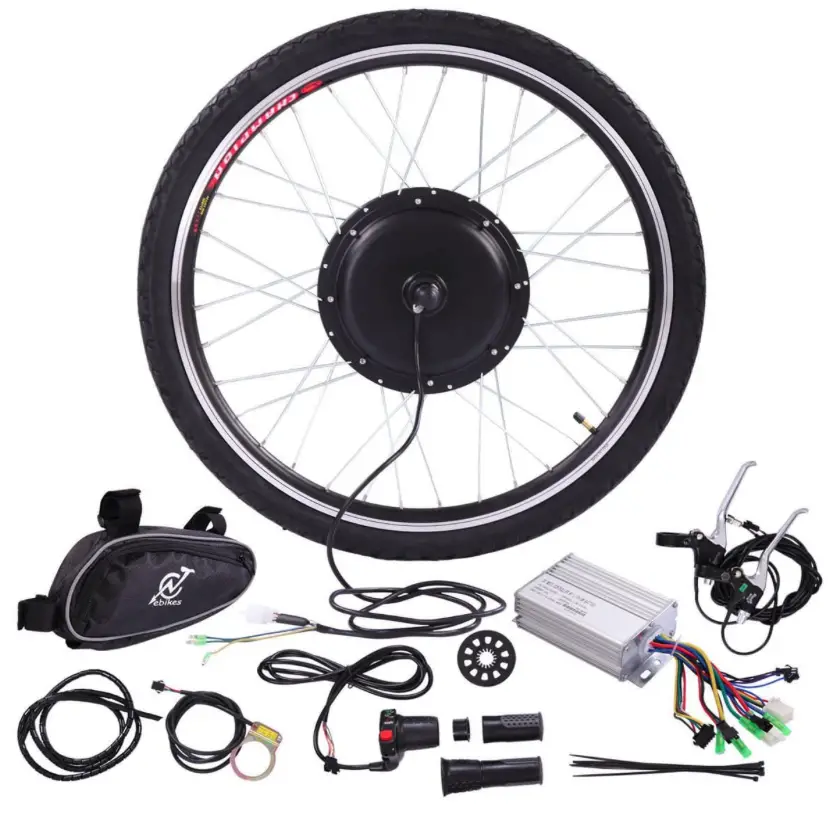
This is one of the less costly wheel conversion kits and it’s actually a front wheel conversion, as opposed to the most common rear wheel. So this is why I’m mentioning it. This, and because of its low price, is why it’s being labeled as one of the “best.
The JAXPETY comes with a 36V 500W front wheel hub motor and can get up to 19.88 mph. It has all of the basic parts you’d need to go electric but also comes with a twist throttle, which is pretty surprising for the price. Otherwise, you’ll get the basics that align with the low price. Getting this kit could be a good way to test out having an electric bike before spending much money.
Overall it has great reviews and lots of questions answered on Amazon, so it appears to be a winner in its price category.
EBIKLING 700C Waterproof Hub Motor Kit
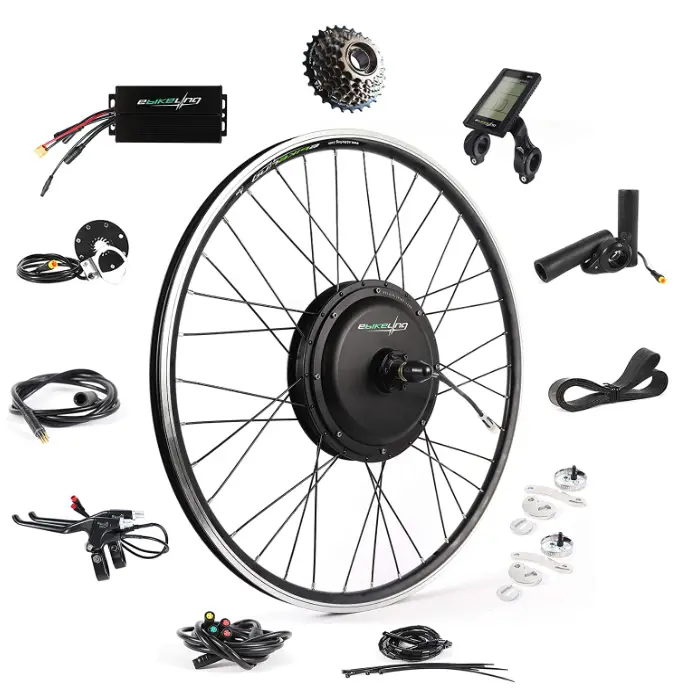
Substantially more expensive than the JAXPETY, the EBIKLING comes with better quality parts, as well as a powerful 48V 1200W hub motor. In addition, you have the choice of upgrading to an LCD display (from an LED), which I think adds a great deal of value to your e-bike.
It also comes with a torque arm, throttle, and cable ties (so you don’t need to buy any). Individual reviewers suggest that you can get up to 35mph with this conversion, which is super fast! However, it’s important to note that many states and countries don’t allow an e-bike that goes that fast in some places. so, make sure you decide where you’ll want to ride your e-bike before settling on this conversion kit.
Note also that it has 700C size wheels as opposed to 26inch, so know your tire size before buying.
BAFANG Rear Wheel Kit
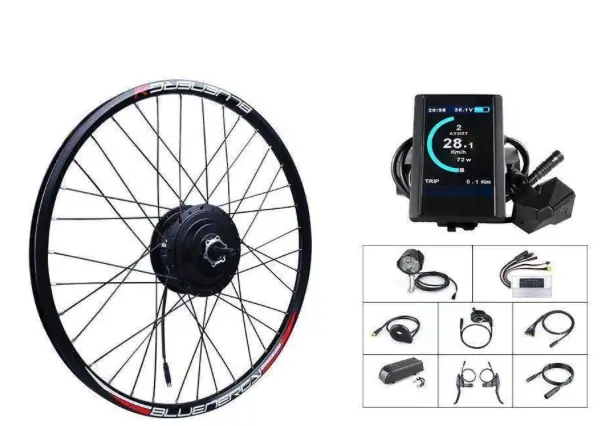
This is a 500W 20-inch rear wheel conversion kit from BAFANG. This is just one variation of at least 50 options that they have, so it really pays to look closely at what you’re getting. The tire size for this conversion is quite a bit smaller, so it might be just right for a foldable e-bike.
Further, it has 9 speeds, hydraulic brakes, and a thumb throttle, not to mention an optional LCD display and an optional battery.
And best of all, the company claims that you can convert your bike in less than one hour! However, reviewers have said that it takes much longer. Once again, I’m sure it has to do with one’s experience with mechanics.
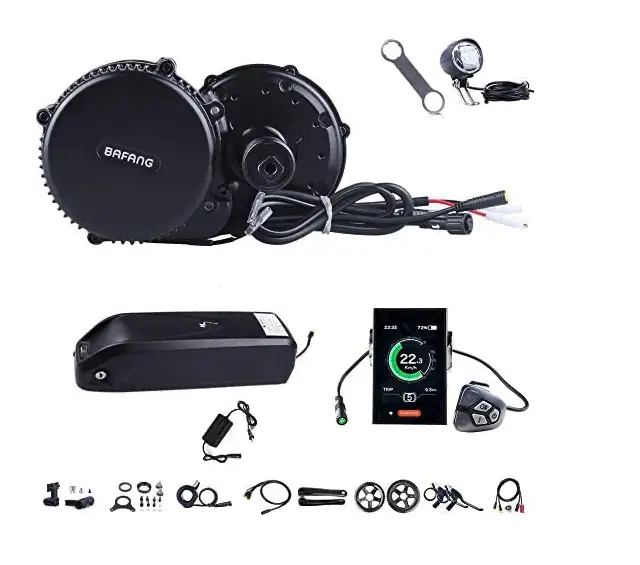
BAFANG BBS02B Mid-Drive Conversion Kit
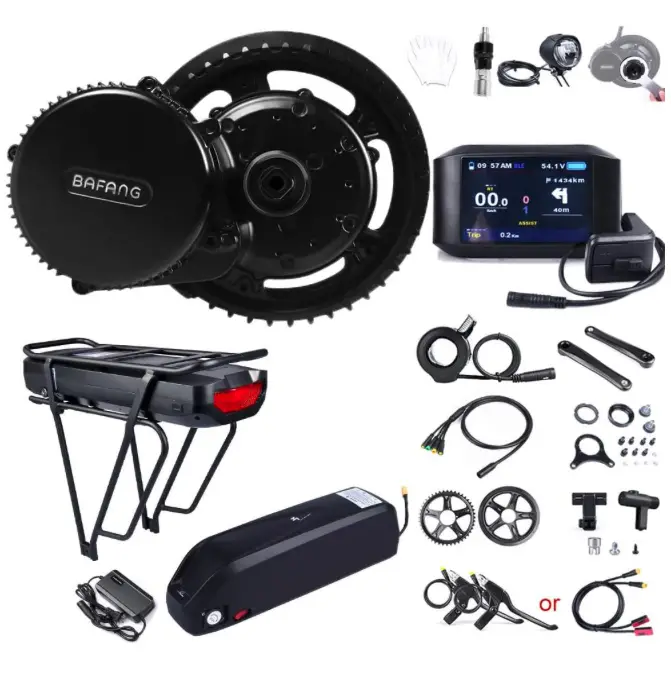
This is the 44T Chain Wheel mid-drive 750W motor conversion kit with an LCD display. It fits 68-73mm bottom brackets, which are compatible for road, commuter, and mountain bikes. However, they discourage its use for fat tire bikes.
This kit comes with a color display, chainwheel, and thumb throttle as well as all of the other basic parts. In addition, you can choose to add the battery if you’d like.
BAFANG BBS02B Mid-Drive 44T Chainring
The price shown in the chart above may seem to be significantly more than the other conversion kits. However, this is an example of a price that includes the battery and charger. You can get this model without the battery for around $400. So the battery itself is actually priced at over $300… and this is a common lower-priced battery.
This mid-drive motor comes with 500W of power instead of the 750W like the previous model and it fits 68-73mm bottom brackets. It also includes all of the basic conversion accessories as well as a thumb throttle.
Don’t forget about these helpful accessories all under $25!
But take a closer look and they are offering a free headlight as a gift. This is a nice offer since headlights are super important for your safety. I keep mine on even during the day if I’m riding on the road.
Bafang also appears to offer a 1-year warranty on their mid-drive motor kits but make sure to check the specific warranty for the model you choose.
What Should I Know Before Converting My Bike to Electric?
| PROS of Conversion | CONS of Conversion |
| You get to keep the bike you love | Conversion will require time and patience |
| Cost-effective: You’ll pay hundreds of dollars less than buying a new electric bike | It might be challenging |
| Customization: You get to choose your own parts | Newer e-bikes are designed to house the electrical components perfectly |
| You might enjoy the project, especially if you’re working with a buddy | The “All-in-one” wheels generally use hub motors instead of mid-drive motors |
| You’ll learn about your e-bike and all of the parts that make it work… that’ll come in handy later on! |
Like any mechanical and electrical project, there are advantages and disadvantages to converting your bike to an electric one. And you should know these before you decide to start building a customized e-bike. The pros and cons table above is a general guideline but not exhaustive, as reasons to convert your existing bike may be different for everyone.
It’ll help to get all of the knowledge you can to make the decision that’s right for you. So consider writing down your own pros and cons list, using the ideas from the above table.
Pros of Converting Your Bike to Electric
There are many good reasons to convert your bike to electrical.
Not only do you get to keep the bike you already love and are comfortable riding, but you also get to add exactly what you want to it to make it even better. If you like the idea of just adding an electric wheel to your almost perfect bike, then you can do so quickly and easily.
But, if you’re a tinkerer, you might have a great time overhauling your bike to add all of the components you want. And you get to pick them out, rather than just accepting what comes on the electric wheel or even a new e-bike.
Further, completing this project with a buddy or your child can make the time pass quickly and make it so much more worthwhile.
Of course, the best advantage is that you’ll save a ton of money, likely a thousand dollars or more! Buying an average conversion kit, as discussed previously, will cost around $350. But to get a good quality brand new e-bike you’ll need to spend upwards of $1200-$1500. Additionally, if you already have a high-quality bike, buying a comparable electric one could cost you $5000 or more.
Cons to E-Bike Conversion
There are some downsides to converting your bike.
Not only will it be a little difficult (unless you’re a super handy person) but it’ll also take time and patience as mentioned above. And you won’t be getting a new bike frame that’s built perfectly to house the motor and battery.
But there are still plenty of ways to convert to electric anyways.
Making an Electric Bike Conversion
In this section, you’ll get an idea of how much time it’ll take to do an electric bike conversion, what tools you’ll need, and basic installation advice.
Make sure to follow the conversion kit manufacturer’s advice for specific installation instructions.
How Long Does It Take to Convert a Bike to Electric?
For the very simplest of conversions, you might be able to convert to an electric bike in under an hour. Of course, this also depends on your mechanical skills and confidence in doing it correctly… and whether you read the “how-to” manual beforehand.
Time spent is also determined by whether you’re adding other parts and lots of additional electronic features. In this case, it might take you a full day or longer, depending on your speed, mechanical knowledge, and whether you have the right tools on hand.
What Tools Are Required?
Generally speaking, the conversion kit you purchase should come with the specific tools you need to install it. However, if you’re willing to put your own electric bike together, there may be some tools that you’ll be expected to have or get prior to installation. And they’ll likely come in handy later on when working on your e-bike.
Additionally, the tools that the manufacturer includes may not be of great quality and could actually cause damage to your bike. So you might prefer to have your own since they’re pretty inexpensive and you’ll use them again for tune-ups and repairs.
Check to see if your kit includes these before you begin installation:
- Free Wheel Removal Tool ($10-$15)- This is not optional! This is used to remove the wheel from the bike. If you’re planning on doing your own tune-ups, you should definitely have this tool at home.
- Torque Wrench ($25-$50)- Having this on hand can be very useful. It’ll allow you to torque each nut, bolt, and screw to a specific degree. Many bolts require a different torque on your bike and you can actually not tighten one enough or over-tighten and strip the thread. The manufacturer’s guide should tell you exactly what the torque of each nut or bolt should be.
- Adjustable Wrench ($8-$25)- You can use this to loosen or tighten different size nuts if you don’t have any other tool made specifically for your need.
- Zip Ties ($7)- These will hold your cables together in place and away from areas where they could get twisted incorrectly or caught.
- Pedal Wrench ($10-$20)- You’ll want to make sure that, after all the work you do making the conversion, you can pedal your bike effectively. So, your pedals should be tightened appropriately.
- Bike Specific Multi-Tool (around $20): This tool is great to have on hand for all of your bike’s mechanical needs. It’ll typically include Allen key wrenches, spoke wrenches, open wrenches, a universal chain breaker tool, Phillips head screwdrivers, flat head screwdrivers, and a Torx key. Additionally, bigger kits might also contain a Mavic spline, pad spreader, and even a bottle opener!
Find out more about maintaining your e-bike correctly:
How to Care for Your E-Bike: A Step By Step Guide
How to Install a Rear Wheel Hub Motor Conversion Kit
Once you buy your conversion kit, you’ll want to follow the specific instructions from the manufacturer on how to install it.
And, this is very important… check your kit to make sure you have ALL of the parts that are supposed to be included. Don’t start unless everything is accounted for!
In general, to install a rear wheel conversion kit with a hub motor you’ll need to do this:
- Remove your bike’s rear wheel.
- Install the electric hub motor on the rear axle of your bike frame and lock it into place.
- Remove the handlebar grips to remove the shifters and brakes.
- Connect your bike’s wiring harness to the controller.
- Install the electric brakes and throttle while your handlebars are removed.
- Put the battery pack under your seat or in a bag hanging off the handlebars.
- Install a pedal-assist sensor.
- Install any other parts you’d like to connect to the electrical system, such as front or rear lights.
- Connect all wires to their respective connectors (either by plugging them in or using wire nuts).
- Use zip ties to keep your cables organized and from being snagged.
